Due to business Reasons we can ship more or less than the order quantity, this is where Shipment Tolerance comes into picture. Shipment Tolerance specify a percentage over or under the order quantity that can be shipped for an item on Order Line.
Shipping uses tolerance to determine the extent of the over/under shipment quantity allowed. Based on Shipping results, Order Management determines whether an order fulfillment is split or considered fulfilled.
Business Benefits of Shipment Tolerance
- Allow for variability in supply chain.
- Eliminates the time taken to perform manual workarounds.
- Contributes to on-time delivery.
- Enhances customer satisfaction.
Shipment Tolerance can be done through following Channels
- Order Management Create Order Page
- File Based Data Import
- EDI
- Order Import Web Services(Including REST)
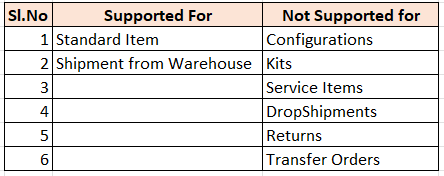
Shipment Tolerance is Supported/Not Supported for following
Basic Setups for Shipment Tolerance
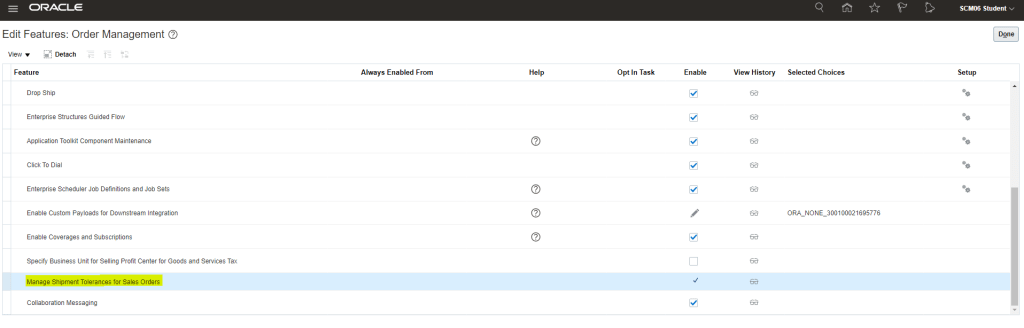
Step 1: Enable Shipment Tolerance if not already Enabled.
- Navigation: Go to Others -> Setup and Maintenance -> Actions -> Select Offering -> Select Order Management -> Opt-In Features. Select Features for Order Management. Verify if Enable check box is selected for “Manage Shipment Tolerance for Sales orders“.
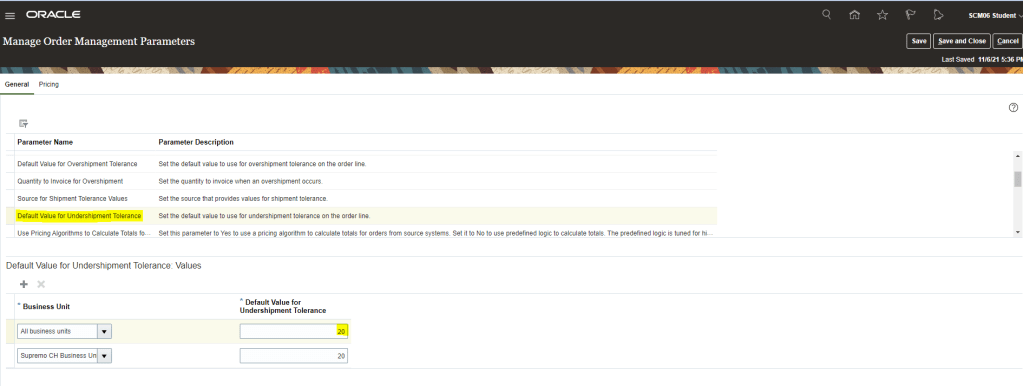
Step 2: Enable Shipment Tolerance if not already Enabled.
- Navigation Go to Others -> Setup and Maintenance -> Order Management -> Enter Task “Manage Order Management Parameter”.
- Select Source for Shipment Tolerance Values. Ensure Business Unit is “All Business Unit”

- Select “Default Value for Undershipment Tolerance” and set it to “20” and for “Default for Overshipment Tolerance” set it to “10”,
- Note : Tolerance Values cannot be modified in an Order Revision.
- Any update done for the two values will only effect orders created after it. Shipment Tolerance for Existing orders cannot be updated.
- Users will be able to Override Partial Picking Restrictions for Under-Tolerance behavior.
- It also supports Shipping over the Requested Quantity using Quick-Ship.
Step 3: Billing
- Navigation Go to Others -> Setup and Maintenance -> Order Management -> Enter Task “Manage Order Management Parameter”.
- Select Quantity to Invoice for Overshipment Values. Ensure Business Unit is “All Business Unit”
- Select whether Quantity to Invoice for Overshipment should be Shipped Quantity or Ordered Quantity.

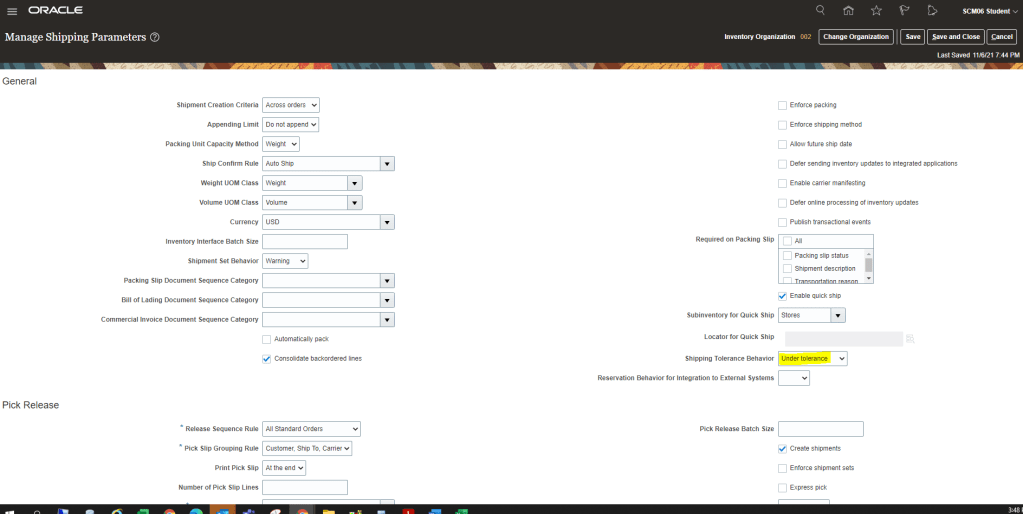
Step 4: Shipping Parameter Shipping Tolerance Behavior is “Under Shipment”
- Navigation Go to Others -> Setup and Maintenance -> Supply Chain Execution -> Enter Task “Manage Shipping Parameters”
- There are two options for Shipping Tolerance Behavior , Under Tolerance and Requested Quantity
- Verify that Shipping Tolerance Behavior is set to “Under Tolerance“.
Perform Full Cycle of Order Management to test Shipping Tolerance.
Step 1 : Create Order and ensure it goes to Awaiting Shipping.

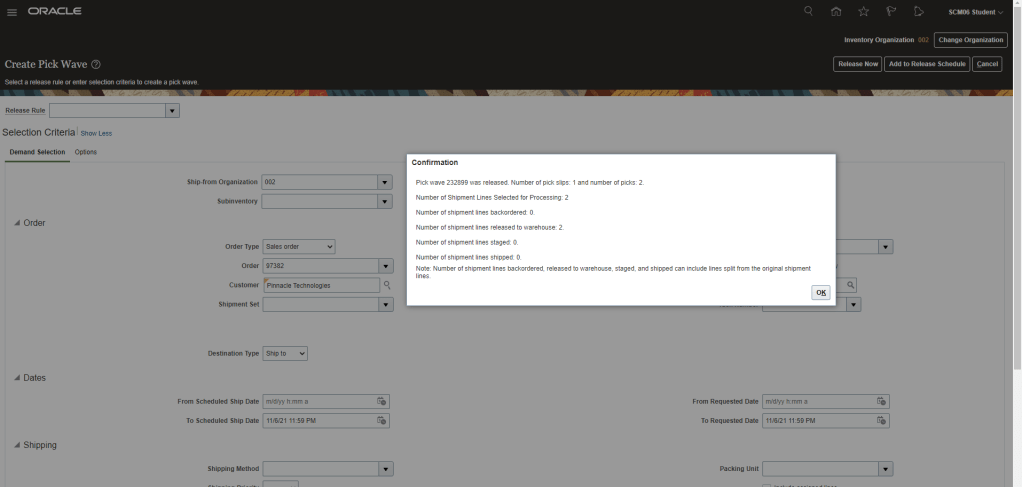
Step 2 : Create Pick Wave for Order 97382.
- Navigation : Go to Supply Chain Execution -> Inventory Management -> Right Hand Corner Go to Shipments -> Select Create Pick Wave.
- Enter Order Number “97382” and click on Release Now.
- Pick wave “232899” gets created.
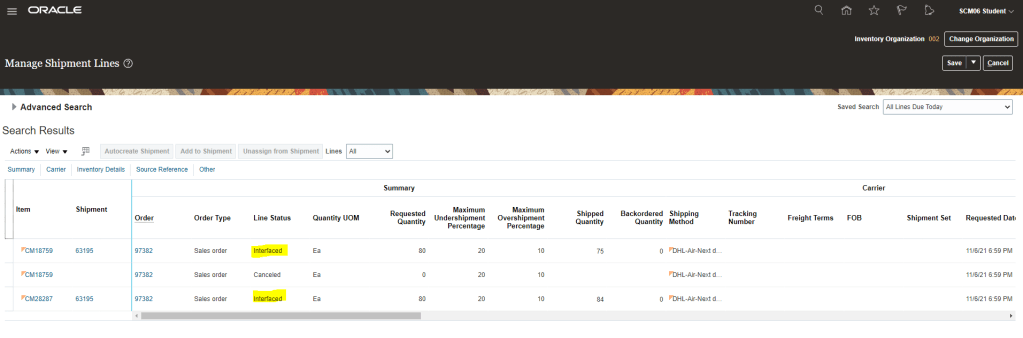
Step 3 : Verify Shipment Lines for Order 97382.
- Navigation : Go to Supply Chain Execution -> Inventory Management -> Right Hand Corner Go to Shipments -> Select Manage Shipment Lines.
- Enter Order Number to see shipment created and also verify Maximum Undershipment and Overshipment Percentage.

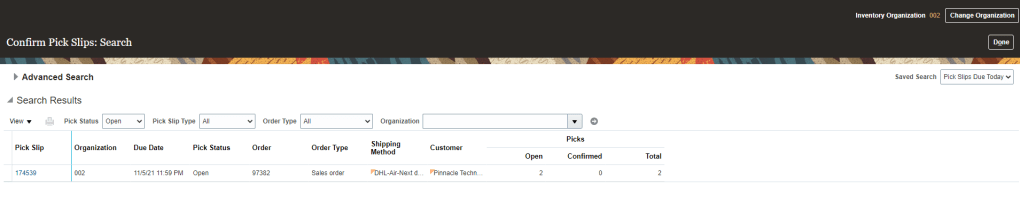
Step 4 : Pick Confirm Shipment Lines for Order 97382.
- Navigation : Go to Supply Chain Execution -> Inventory Management -> Right Hand Corner, Go to Shipments -> Select “Pick Confirm”.
- Enter Order Number to see Pick Slips.
- By default Picked Quantity value will be what was Ordered Quantity.
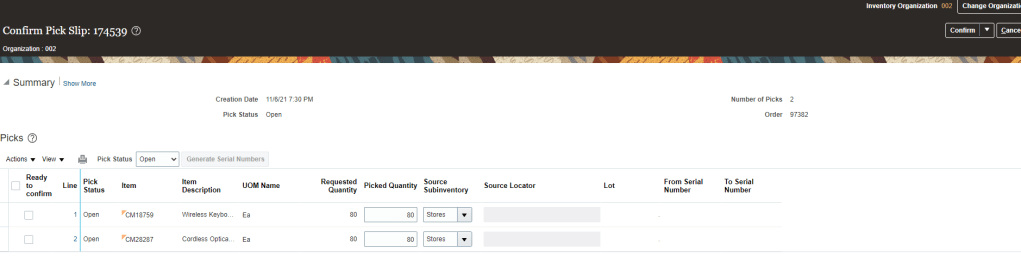
- Change Picked Quantity for both the lines, for one its under shipped( 75 instead of 80) and other line is Over shipped(84 instead of 80).
- Select “Ready to confirm” line for both lines and Click on Confirm and Go to Ship Confirm

Step 5 : Ship Confirm Shipment Lines for Order 97382.
- Although we will reach directly to Ship confirm screen from above steps but in case we want to come to this screen then follow below steps
- Navigation : Go to Supply Chain Execution -> Inventory Management -> Right Hand Corner, Go to Shipments -> Select “Manage Shipment Lines”.
- Enter Order Number to see Shipment Lines.
- Click on Ship Confirm.

- Ship confirm happens
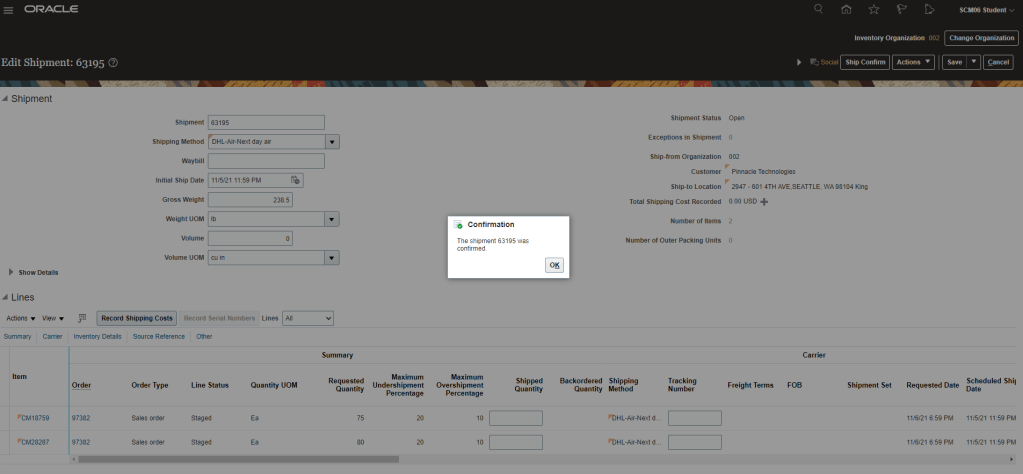
- Verify that shipment lines are in “Interfaced Status” and Shipped quantity is what we selected above.
Step 6 : Verify Order lines Status is Awaiting Billing and Fulfillment lines remains intact.
- Verify that Status of Order line is ” Awaiting Billing”.

- Also verify that there is no split of Fulfillment lines due to change in Picked/Shipped Quantity

Step 7 : Generate Invoice for the Order line.
- Go to Tools -> Scheduled Process -> Select Process “Import AutoInvoice”
- Enter Values
- Business Unit : “US1 Business unit”.
- Transaction Source : “Distributed Order Orchestration”
- From Sales Order number : “97382”
- To Sales Order number : “97382”
- Click on Submit
- Order gets Invoiced.
Step 8 : Verify Order lines Status is Closed and check Invoice number of Order.
- Verify Status of Line is “Closed” and do see Amount of each Order line.

- Now verify Invoice amount, Fulfilled quantity for each line.
- Navigation: Switch to Fulfillment View -> Fulfillment Tab -> select each fulfillment line -> Actions -> View fulfillment details
- For Fulfillment Line 1 verify below details
- Order Quantity = 80
- Fulfilled Quantity = 75
- Invoice amount = 4106.25

- For Fulfillment Line 2 verify below details
- Order quantity = 80
- Fulfilled Qty = 84
- Invoice Amount = 2023.56

Step 9 : Verify total Invoice amount to see its billed for Shipped quantity and not actual order quantity.
- Navigation : Go to Receivables -> Enter Invoice number and see the invoice amount for the order
Apologies : My instance does not have access to Receivables module so I cannot show total invoice amount but as you could have seen in step 8, Total invoice amount will be different from Total order amount based on sum total of Line 1 and Line 2.
