This post is in continuation to Ship Confirm Process but with a change where in Business do not want Picking to take place and as soon as Orders are released from Order Management, Shipping should take place.
This generally happens when shipment process happens in bulk which enhances the performance or so called operational efficiency.
Mandatory Setups for Quick Ship Process
Setup 1 : Ensure Pick Confirmation is unchecked in Organization where we do not want Picking to happen.
- Navigation: Go to setup and Maintenance -> Enter task “Manage Inventory Organization Parameters”.

- Go to tab Item Sourcing Details. Under Picking Defaults -> Ensure “Pick confirmation required” is not checked. i.e. we do not want picking to happen in this warehouse.

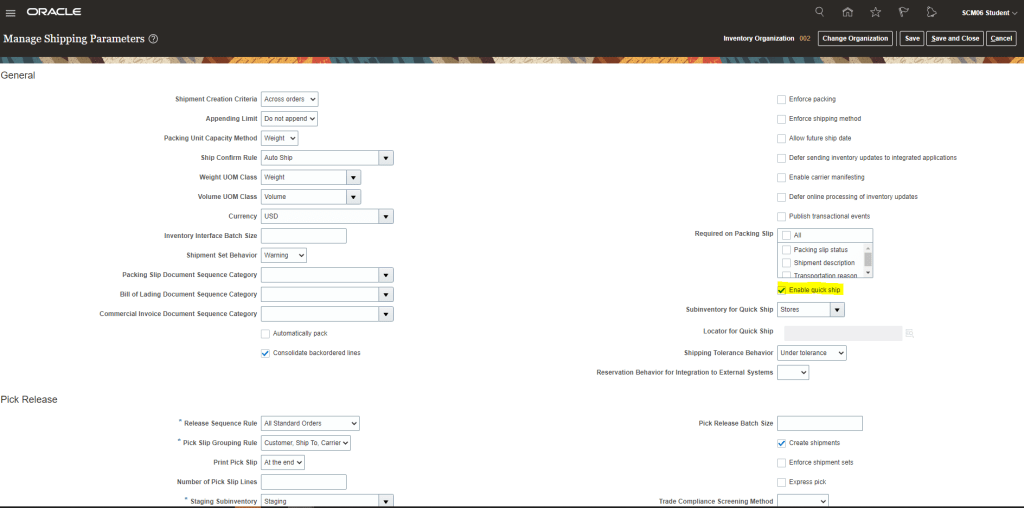
Setup 2 : Ensure Quick Ship is enabled in Shipping Parameters.
- Navigation: Go to setup and Maintenance -> Enter task “Manage Shipping Parameters”.
- Ensure “Enable quick Ship” is checked.
- Subinventory for Quick Ship should be filled with Subinventory from where shipment happens.
- Please Note: i.e this Subinventory should have all necessary quantity else it will be difficult for warehouse operator to manually change subinventory at time of Ship Confirm.
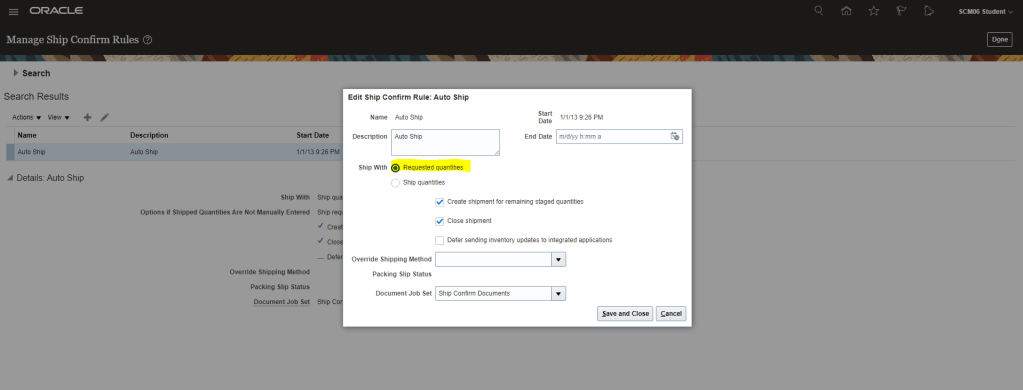
Setup 3 : Ensure Quick Ship is enabled in Shipping Parameters.
- Navigation: Go to setup and Maintenance -> Enter task “Manage Ship Confirm Rules”.
- For rule “Auto Ship“, Ship with section is defaulted for “Ship quantities”. In case we have Subinventory populated under “Subinventory for Quick Ship” in Setup 2, we should change it to “Requested quantities”.
Setup 4: Verify that Subinventory has enough stock of the Item which needs to be quick shipped.
- Go to Supply Chain Execution -> Inventory Management -> Manage Item Quantities
- Enter Item which we are going to order.
- Verify we have On Hand quantity in necessary Subinventory “Stores”.

Process flow for Quick Ship
Step 1 : Create order
- Create order and ensure Line status as Awaiting Shipping.

Step 2: Create Shipment
- There are two ways to create shipment for any order.
- Use Auto create shipment “OR”
- Run ESS job
- Using Autocreate Shipment
- Go to Supply Chain Execution -> Inventory Management -> Task Panel on Right -> Go to Shipment -> Select Shipment Lines.
- Enter Order Type, Order Number.
- Click on Autocreate Shipment.

- Using ESS job
- Go to Tools -> Scheduled Process -> Enter Job “Create Shipments”
- Enter Ship-from Organization “002”.
- Create Shipment = “Yes”.
- Shipment Creation Criteria = “Across Orders”.
- Line Status = “All”
- Submit the Job
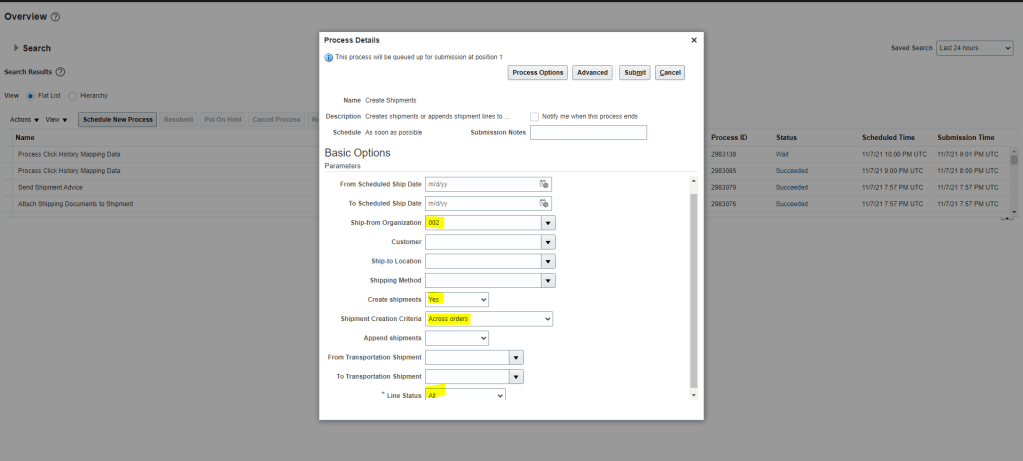
- Job completes and Shipment gets created.

- For both lines
- Shipment Number gets generated “63203”
- Quick Ship Flag is NOT enabled for both the lines
- Line status is “Ready to Release Status” so it is ready to be shipped.

Step 3: Stage the Shipment Lines.
- Enter shipped quantity for both the lines
- Select both lines, go to Actions and Click on Stage Lines.
- Line status will be changed to Staged and Quick Ship Status will become enabled

Step 4: Ship Confirm Shipment Lines.
- Select both lines, go to Actions and Click on Ship Confirm.

- Line status will be changed to “Shipped“.

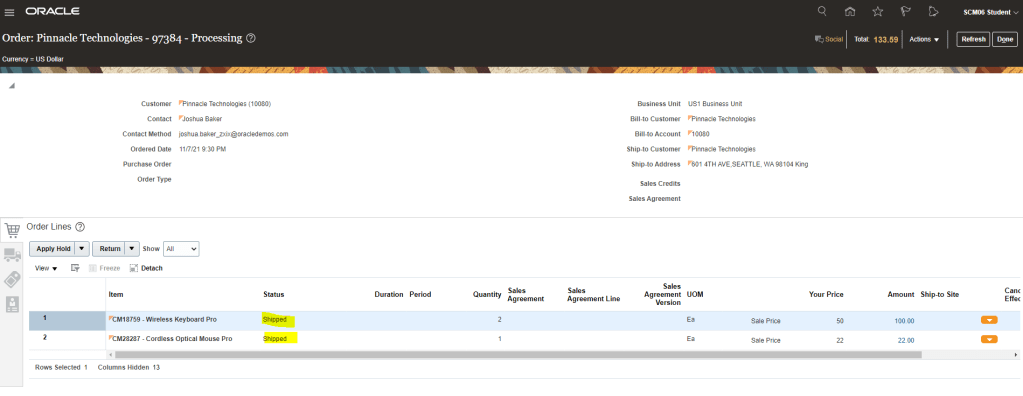
Step 4: Verify line Status of each Order Line.
- Status of each Order lines become “Shipped” and later on “Awaiting Billing”.
- Note: User can also use “Perform Shipment” FBDI in case you want to do above steps for multiple order in batches.
