In this topic we are going to Cover Work Definition of ATO item and how to View and Complete a Work Order.
Pre-requisite : Do go through the Configure To Order details to get basic understanding.
Configured Item uses either Make or Buy Flow. In case of Buy Flow, Purchase order comes into picture

There is separate documentation for Assemble to Order- Make Flow.
Setup for Buy Flow
Step 1 : Create New Product or Modify existing Product with following properties.
- Navigation : Product Management -> Product Information Management -> Select “Manage Item”
- Specification -> Purchasing -> It should have Purchasable as “Yes”.

- Categories should have one Catalog as “Purchasing”.
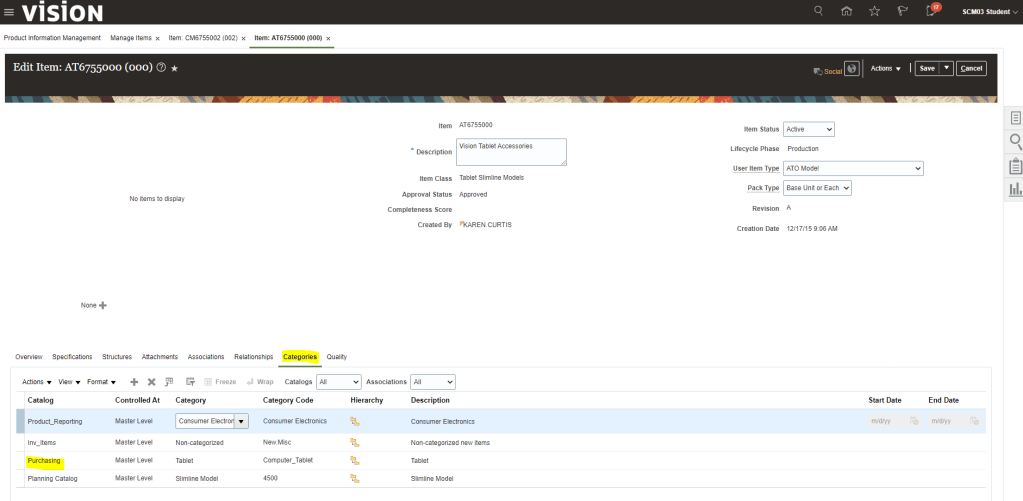
- Repeat above steps for Item “OC6755100” and “CM6755002”.
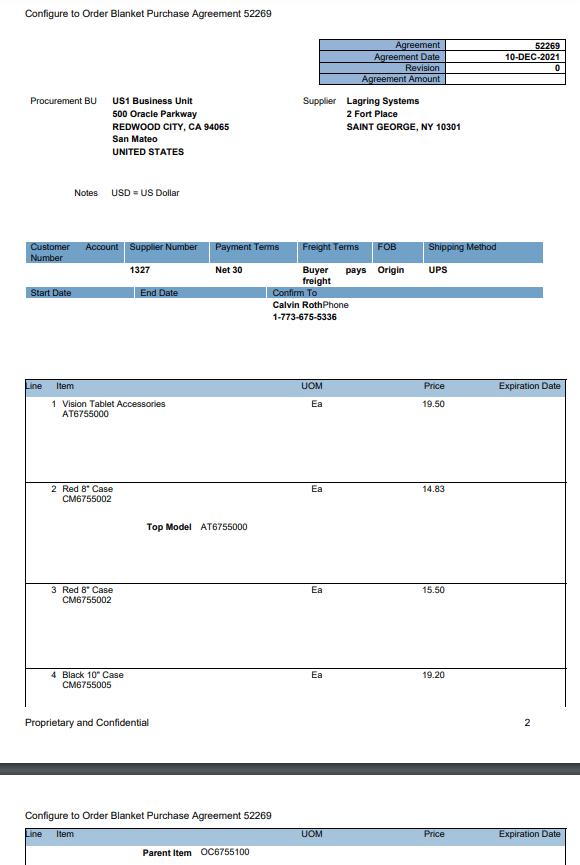
Step 2 : Create Blanket Purchase Agreement.
- Log out and Login with user profile of Calvin.Roth(Procurement Manager).
- Navigation: Procurement -> Purchase Agreements -> Create Agreement.

- Enter Details as follows
- Style = “Configure to Order Blanket Purchase Agreement”
- Procurement BU =”US1 Business Unit”
- Supplier = “Lagring Systems”
- Supplier Site = “Lagring Systems”
- Supplier Contact = “Swensen,Lars”
- Currency = “USD”
- Buyer = “Roth,Calvin”

- Using “+” button add below Items for the Purchase agreement with below condition
- Item “AT6755000” to be added with a price
- Item “CM6755002” to be added standalone with a price
- Item “CM6755002” to be added with Top Model = “AT6755000” and with a different price.
- Reason for doing it is if CM6755002 is purchased as part of configuration which has Top Model as “AT6755000” it will have price of $14.83 but when CM6755002 is purchased as part of some other configuration it will have price of $15.50
- Item “CM6755005” to be added with Parent Item = “OC6755100” and with a price.

- Once details entered, click on submit button.

- We can view PDF to see the details of BPA
Steps for CTO Buy Flow
Step 1: Create Sales Order with configured Item.
- Please note : There is some issue with CTO item with which BPA was done in setup so taking different CTO item,
- Create order with CTO item “AT1501010”
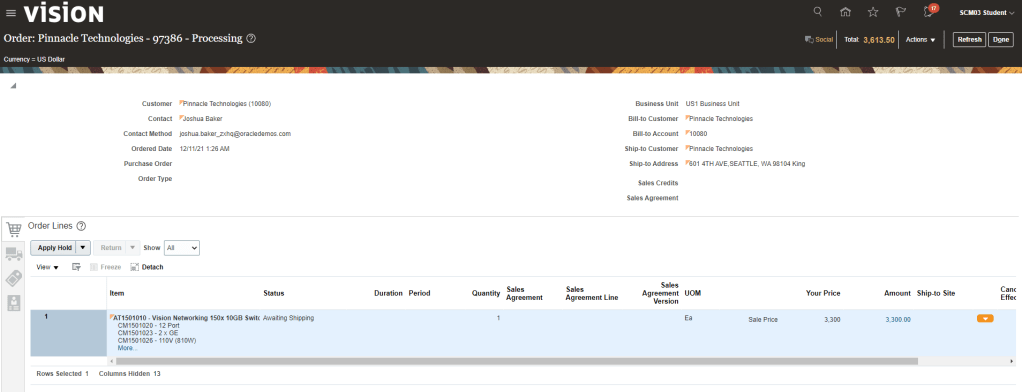
- Once item is added it will ask to configure and Add so Navigate the steps to of Configure and ADD

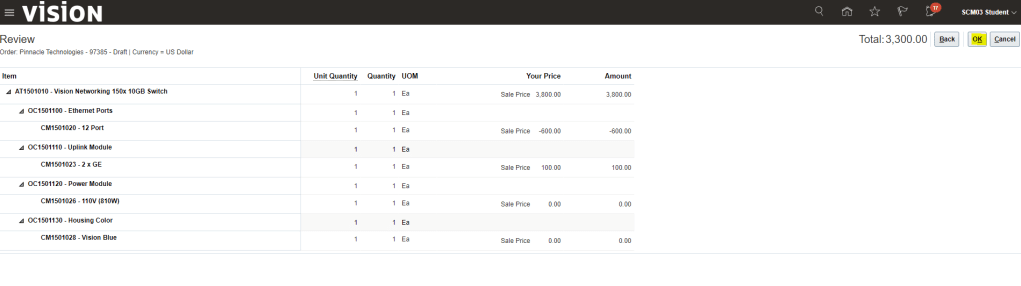
- Select the Requested Date , 3 days from current Date and click on Submit Button
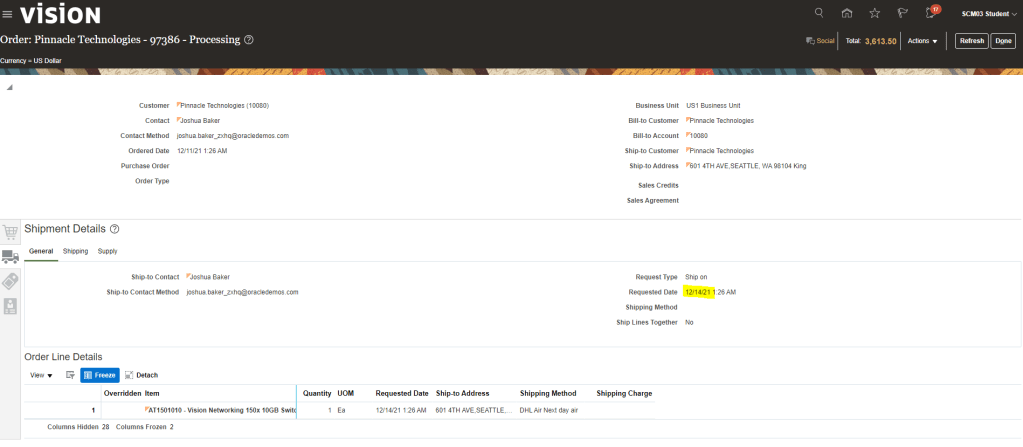
- Switch to Fulfillment View to verify the status of Order Line
- Status = “Awaiting Shipping”
- There will be Supply order created for it.
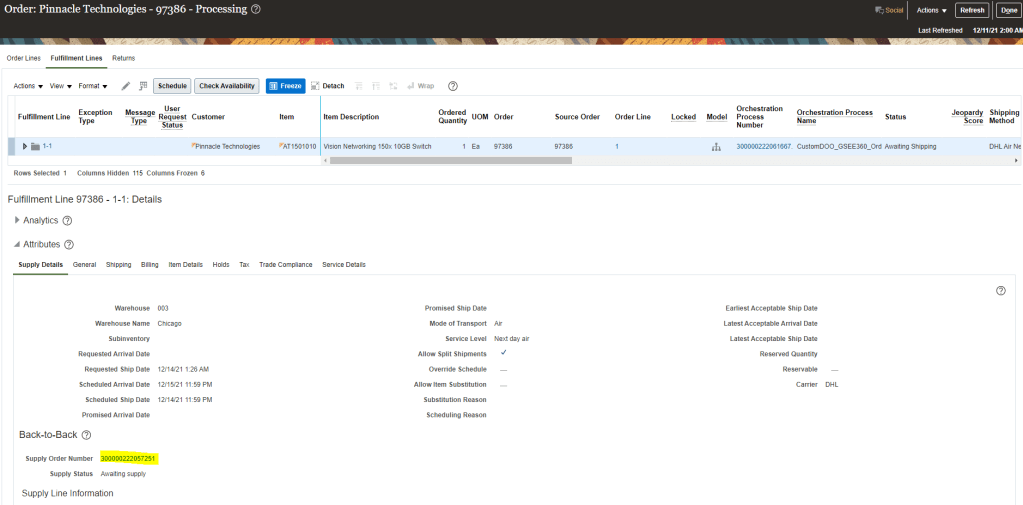
- Click on Supply order to navigate to the Supply Order screens. Purchase Requisition and Purchase order will be created.
- Purchase order = “164119”
- Purchase Requisition = ” 204084″.

- Click on Purchase Order number = 164119″ to navigate to Purchase order screen.

- Click on “View PDF” to see the Document of Purchase Order.


Step 2: Receive Purchase Order .
- Navigation -> Supply Chain Execution -> Inventory Management -> Receive Expected Shipments.

- Enter details as shown below
- Ensure Organization = “003”
- Enter Purchase Order = “164119”

- Enter quantity = 10″ , Subinventory = “Stores” and click on Create Receipt.

- Click on Submit.

Step 3: Receive Shipment Lines.
- Navigation -> Supply Chain Execution -> Inventory Management -> Manage Shipment Lines.

- Enter Sales order ” 97386″
- Verify that Line Status = “Ready to Release”.
- Click on Pick Release
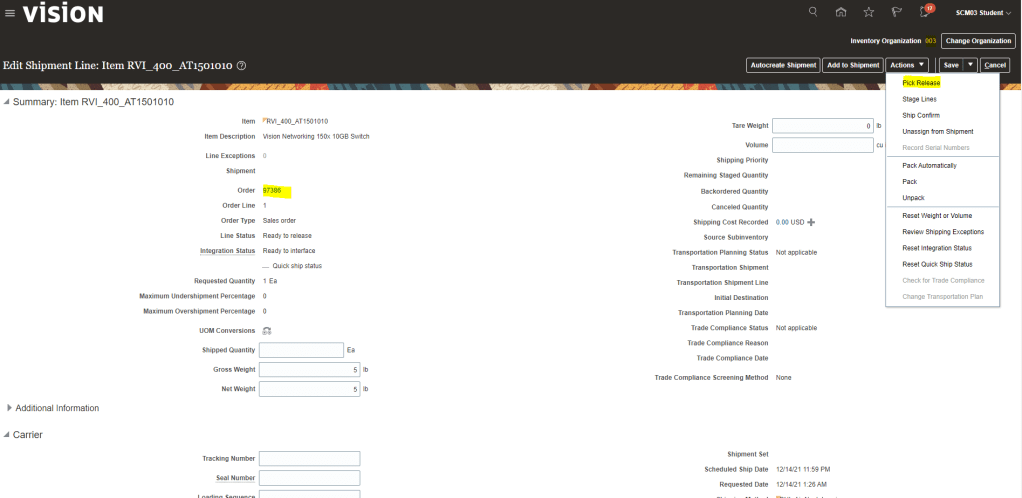
- Line gets pick released

- After Pick Release, Status of Line becomes “STAGED”

- Enter quantity as “1” and click on Actions -> Ship Confirm.
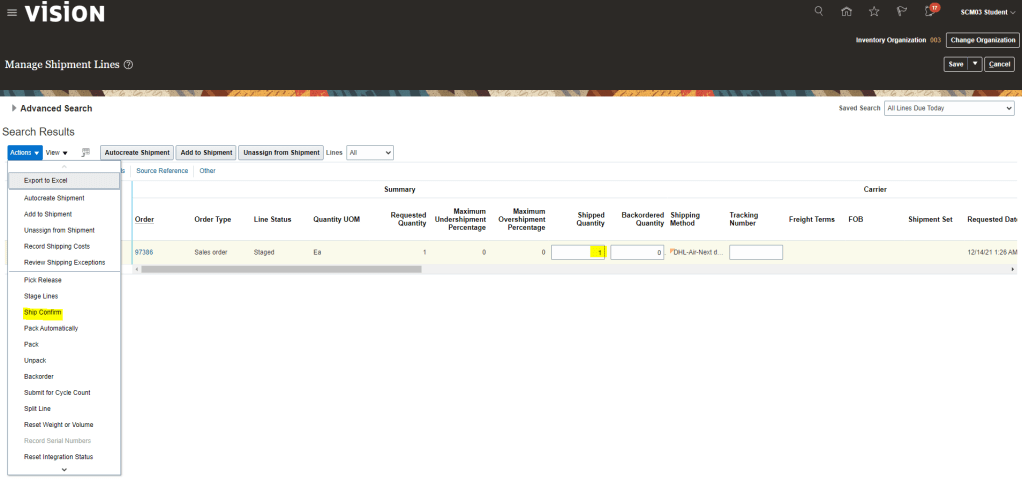
- Ship Confirmation happens.

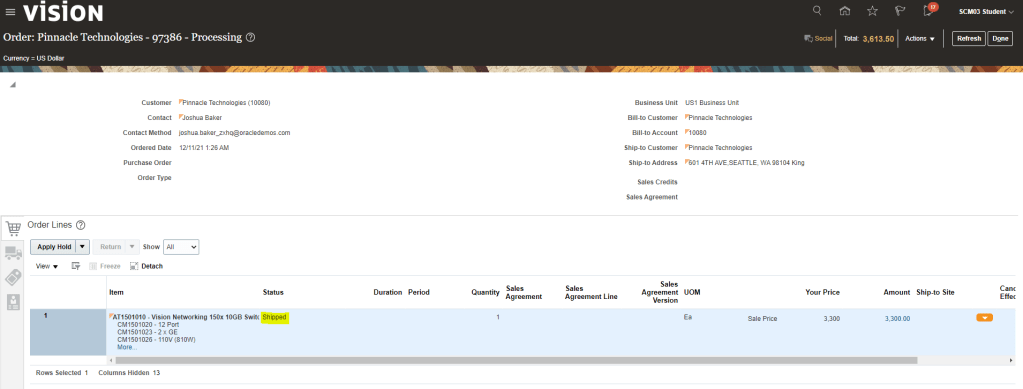
Step 4: Verify Status of Sales Order, Supply Order and Purchase order
- Status of Sales order changes to “Shipped“.
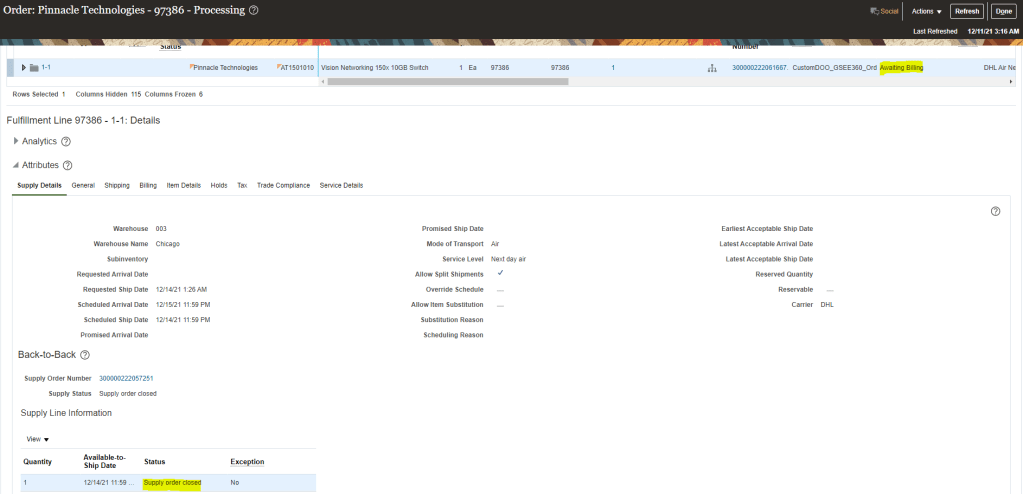
- Status of Supply Order = “Goods available”

- Status of Work Order = “Closed“.

- Status of Sales Order changes to “Awaiting Billing” and Status of Work Order = “Supply Order Closed“.
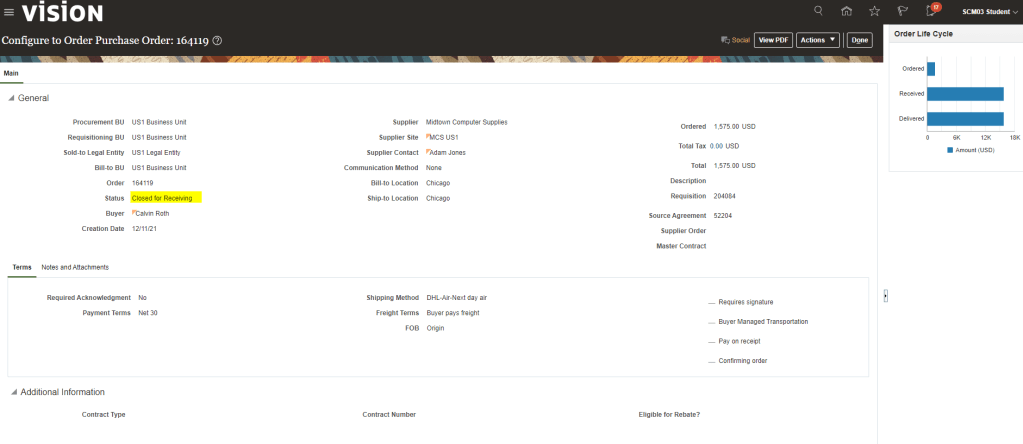
- Status of Purchase order changes to “Closed for Receiving“
Additional Steps : We can verify Purchase order and if needed close it explicitly
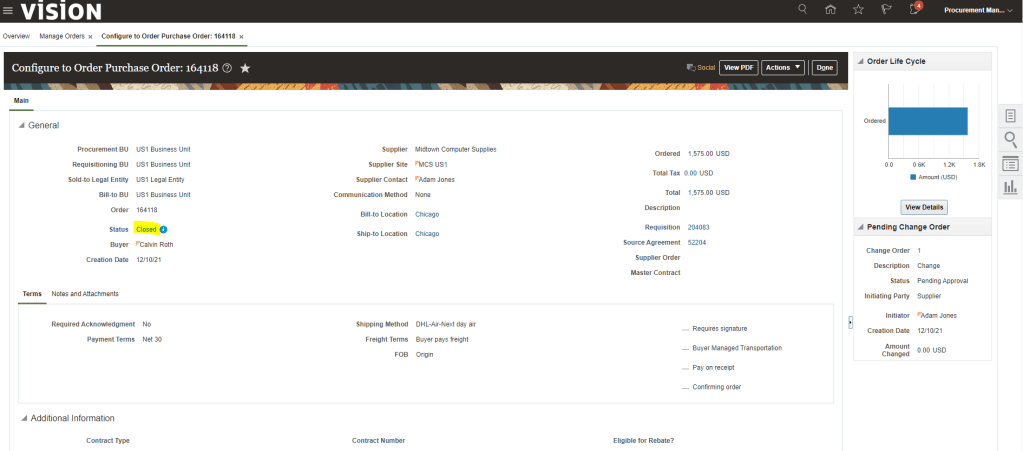
- Login with CALVIN.ROTH profile and search for Purchase Order = 164118.

- Click on “Acknowledge”

ss

- Select Action -> Closed.


- Status changes to “Closed”.