Create a Source Connection, which is a Trigger role, for requests to be sent to OIC.
Select adapter
Define connection
Security properties
Target Connection, which is a Invoke role, for requests sent from OIC to the Target.
Add and configure the Source connection.
Add and configure the Target connection.
Data Mapping between connections
Map data for the invoke connection request.
Map data for the response to be returned to the source(if applicable).
Define key business identifiers for monitoring purpose.
Activate and test.
Creation of App Driven Integration
Step 1 : Create Source Connection
Navigation : Integrations -> Connections -> Click on Create.
Select Adapter = “SOAP”.
Enter Details of Connection
Enter Name = “ora004 Greetings”
Identifiers gets populated by default
Role = Trigger as this connection will serve as Interface into our connections
Click on Create.
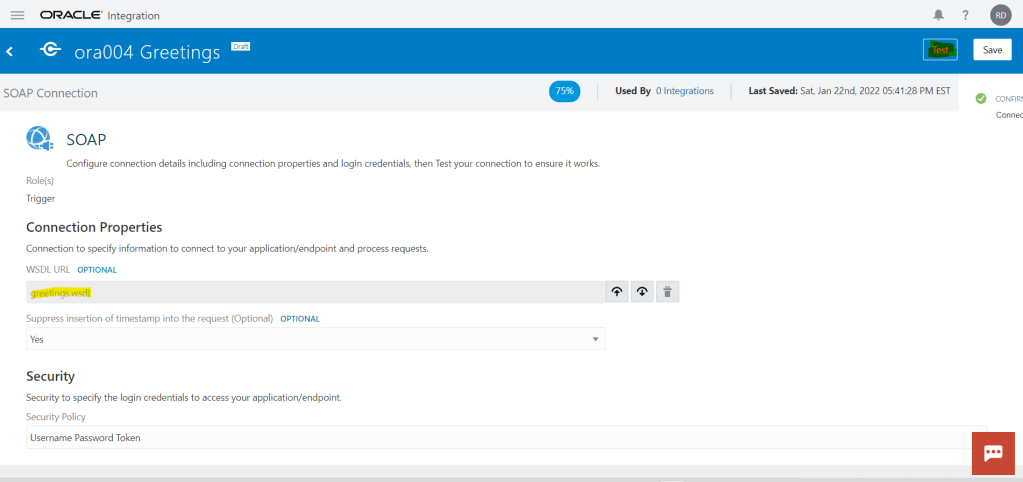
In next screen we need to
Select WSDL file, for which we will choose “greetings.wsdl”.
Suppress Insertion of timestamp = “Yes”.
Security Policy = “Username Password Token”.
Click on Save.
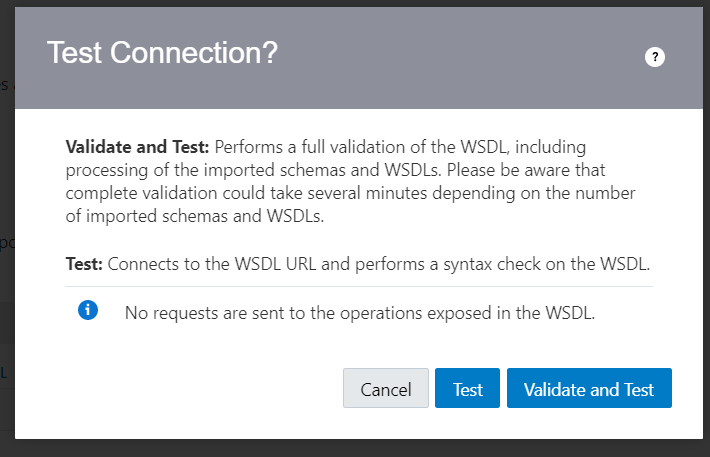
Click on Test. If there would be any error during testing, it will be reported which we need to fix else, test successful screen would appear.
Ensure % value should be 100% which denotes its ready to be used.
Click on Save and then < button to exit.
Step 2 : Create Target Connection
Navigation : Integrations -> Connections -> Click on Create.
Select Adapter = “SOAP”.
Enter Details of Connection
Enter Name = “ora004 Say Hello”
Identifiers gets populated by default
Role = Invoke as this connection will serve as Interface into our connections
Click on Create.
In next screen we need to
Select WSDL file, for which we will choose “HelloWorld.wsdl”.
Security Policy = “No Security Policy”.
Click on Save.
Click on Test. If there would be any error during testing, it will be reported which we need to fix else, test successful screen would appear.
Ensure % value should be 100% which denotes its ready to be used.
Click on Save and then < button to exit.
Step 3 : Create Integration
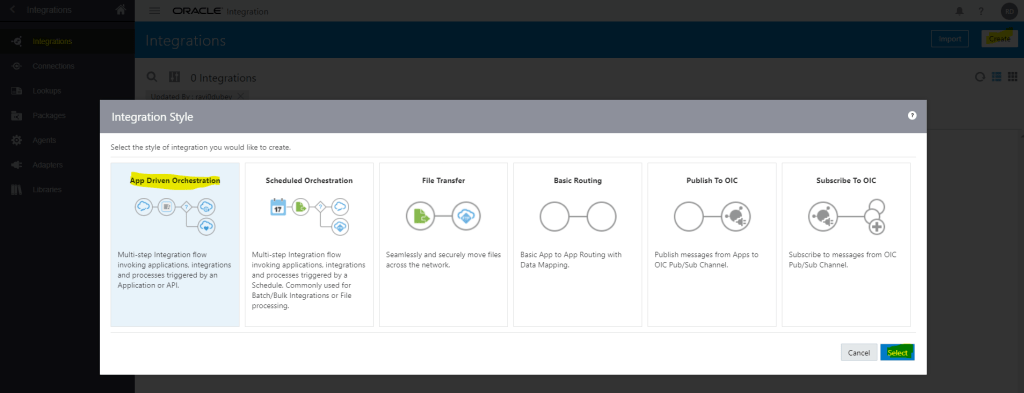
Navigation : Integrations -> Integrations-> Click on Create.
Select “App Driven Orchestration” and click on Select.
Enter Name, Identifier and Version gets populated by default.
Documentation URL , Keywords, Package and Description are optional fields.
Package can be entered when we want to club integration into One packages,
Click on Create.
A black canvas gets generated.
Click on Vertical to change it to Horizontal.
Click on + button and select trigger connection “ora004 Greetings” created in Step 1
Enter Name = “Greetings” and click on Next
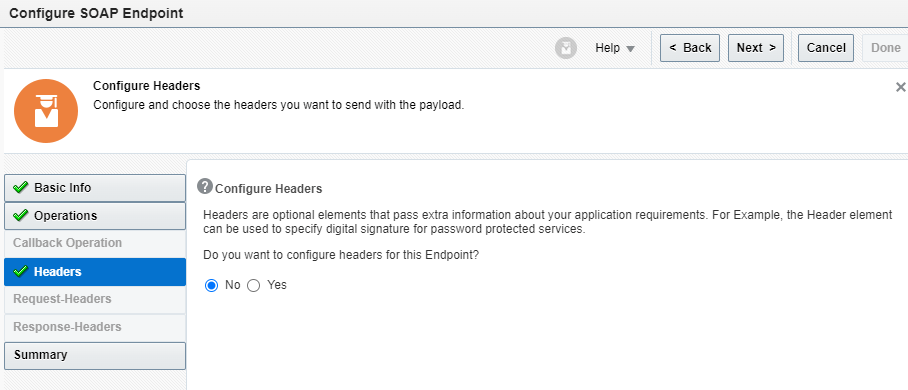
Disable soapAction Validation = “No”
If we select configure Headers for this Endpoint = “Yes” then Request-Headers and Response-Headers will get enabled.
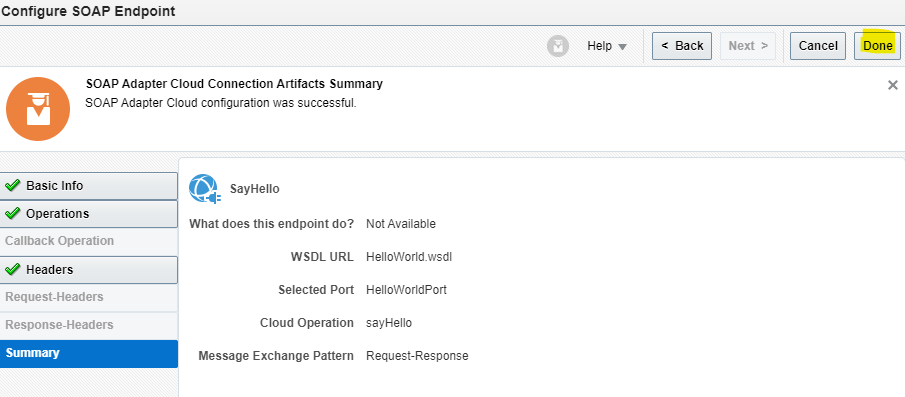
On Summary Page, click on Done.
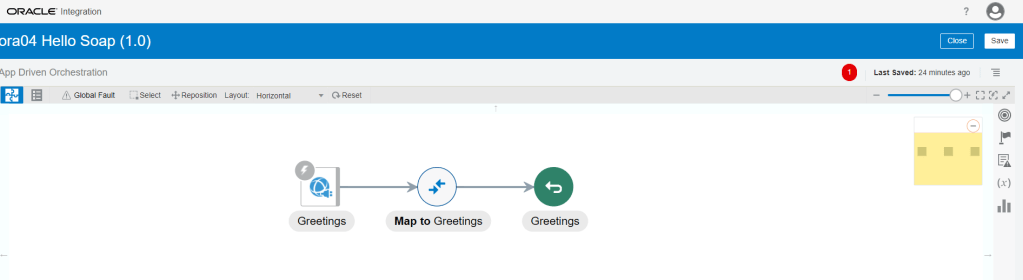
Trigger Connection gets integrated to Integration.
In between connection Greetings and Map to Greetings, click on Arrow. A + icon appears.
Click on “+” icon and select Invoke Connection “ora004 Say Hello” created in step 2.
Give name to Invoke Connection and click on “Next”.
Select the Operation “sayHello”.
Click on next for header and on Summary Page, click on Done.
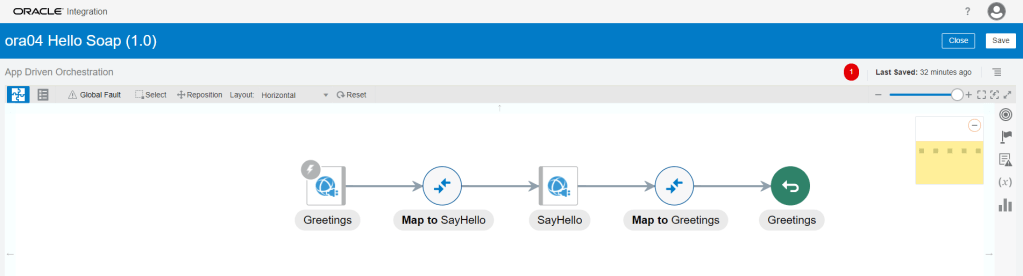
Both Trigger and Invoke connection gets added to Integration with the data Mapper in between.
Step 4 : Data Mapping
Step 4.1 Mapping between Greetings and Say Hello.
It allows us to configure data to be sent in the request to the SOAP web service invoke connection.
Mapping needs to be done for Source Field (Greetings Request -> FirstName) to Target Field (Body ->sayHello -> name).
Click on “Map to SayHello” and click on Pencil Button.
Below screen appears where mapping can be done. Drag and Drop from FirstName of Greetings Request to “name” field of SayHello Request Soap.
Click on Validate and Close.
Ensure circle of “Map to SayHello” turns solid.
Step 4.2 Mapping between Say Hello and Greetings.
It allows us to configure data to be sent as response to the integration client.
Mapping needs to be done for Source Field (SayHello Response ->sayHelloResponse -> sayHelloReturn) to Target Field (Greetings Response-> Greeting).
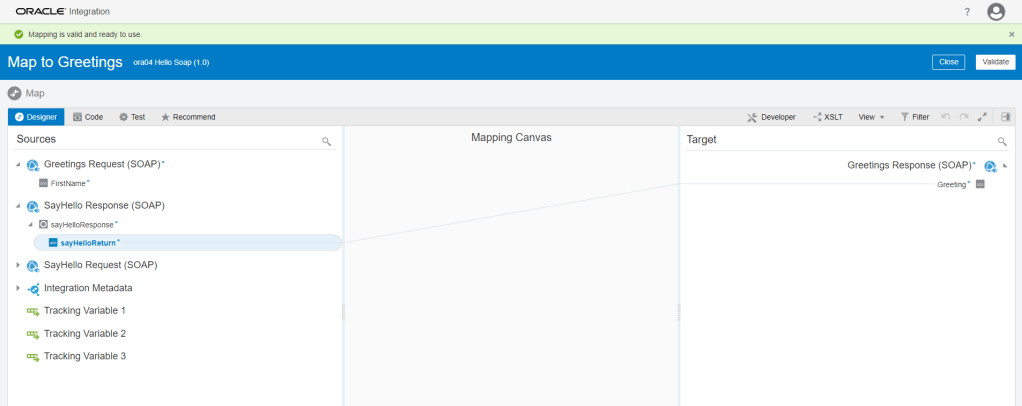
Click on “Map to Greetings” and click on Pencil Button.
Below screen appears where mapping can be done. Drag and Drop from “sayHelloReturn” of SayHelloResponse of SayHello Response to “Greeting” field of Greetings Response Soap.
Click on Validate and Close.
Ensure circle of “Map to Greetings” turns solid.
On right hand Corner, click on 4 lines, Tracking along with other option will appear.
Click on Tracking.
Drag and Drop Firstname from GreetRequest to Tracking field and click on Save.
Step 5: Activate the Integration
Once Integration is in Configured mode. Click on Configure icon, it turns into power button which is used to activate the Integration.
Click on Enable Tracing box.
check on Include Payload box
Click on Activate.
It will take some time to activate the integration post which Integration should be ready to be used.
Step 6: Test the Integration
We can test Integration Using SOAP UI
Get URL from the OIC cloud by clicking on Play button and select WSDL URL.
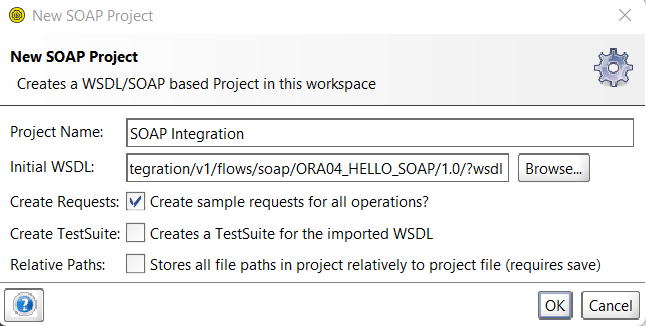
In SOAP UI, enter Project Name and Paste the URL in Initial WSDL section.
Once Project is added, Enter Firstname in Left pane which will be our input for testing..
On left Bottom, click on Auth and select Basic.
Enter Username and Password of OIC cloud.
Once Username and Password is added, right click on Left pane.
From List select “Add WSS Username token”, then select PasswordText from the dropdown list.
Click on OK.
Click on Green button to test.
We will see response from OIC cloud “Hello Ravi”
Step 7: Monitor the Integration
We can either go through Monitoring -> Integration -> Tracking
OR
Go to Integrations -> Integration and select the Integration. Click on Play Button and click on Track Instances.
Either way we will reach Integrations -> Tracking screen where it will show all instances of OIC Integration run.
Under status column it will show status of each run instance.
An eye will appear on each, on clicking it we will see the activity stream for the run.
In each activity stream we can click on Message to see the message passed at each level. It will help to track and diagnose any error.