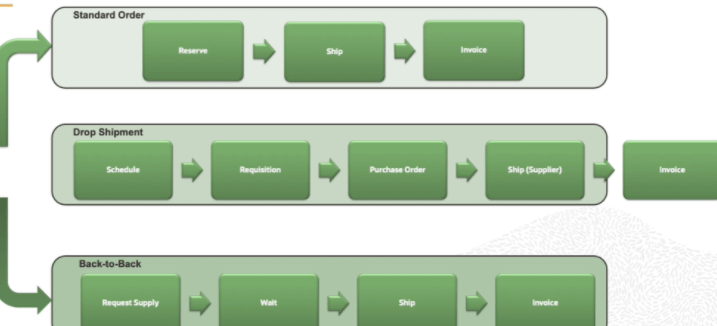
Order to Cash Process has below lifecycle right from Order Capture Process to Invoice & Collect

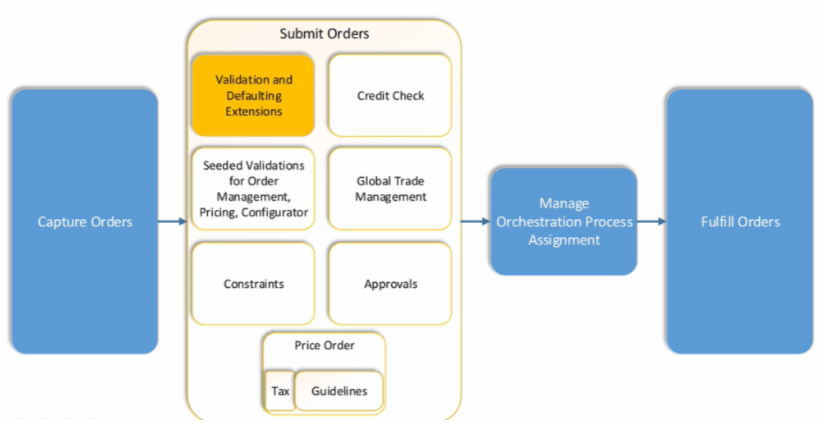
Order Once Submitted goes through following steps
- Capture Order
- Submit orders has following steps
- Validation and Defaulting Extension
- Credit check of Customer
- Seeded Validations for Order management, Pricing, and Configurator
- Global Trade management
- Constraints
- Approvals
- Pricing of Order
- Manage Orchestration Process Assignments
- Fulfill Orders
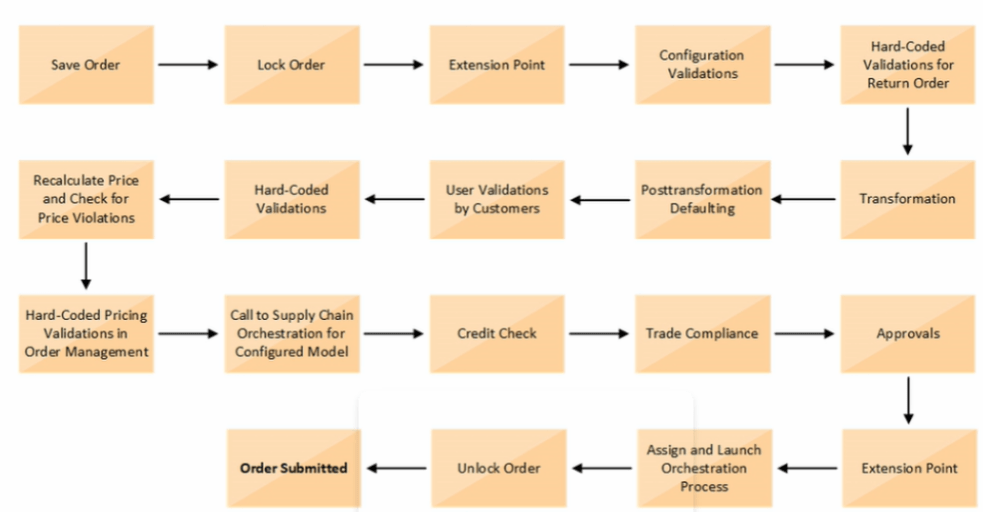
Activities which takes place during Order Submission Process
Below activities takes place as during Order Submission process
- As soon as Order is Saved it gets Locked
- Order Management Extension Point, Before Submission of Order, gets executed
- Configuration Validations gets executed
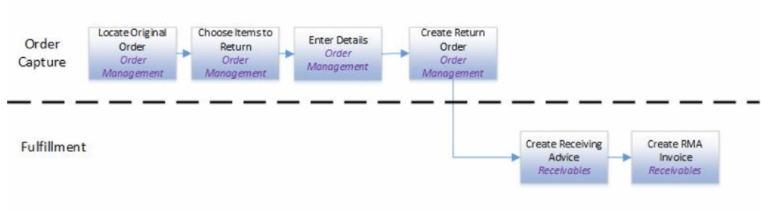
- In case of Return order, Hard-Coded Validations gets executed
- Transformation rules run. See details
- Post Transformation Defaulting rules gets executed. See details
- User Validations by Customers gets executed
- Hard-Coded Validations gets executed
- Recalculate Price and Check for Price Violations. See Details
- Hard-Code Pricing Validations in Order Management gets Executed
- Call to Supply chain Orchestration for Configured Model. See Details for Configured Model
- Credit Check of Customer
- Trade Compliance
- Approval flow of Order. See Details
- Order Management Extension Point, During and After Submission of Order, gets executed
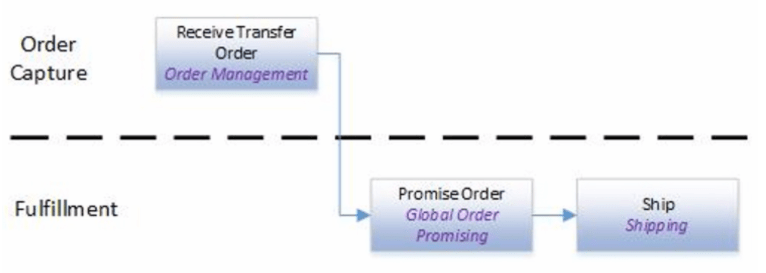
- Assign and Launch Orchestration Process. See Details.
- Unlock the Order
- Finally Order gets submitted.
Order Management Extension
- A Groovy script written by programmers which programmatically changes the Logic or changes the Order Management Deployment. It also call web services
- For Order Submission, extensions can be written to
- Validate the Order
- Validate the Business Rule i.e. Verify that a PO number entered on the sales order matches a PO number in Procurement System.
- Set Default values on the Order for following
- Default attributes on an Order Line
- Fetch Order preferences from Customer Masters to the Order
- Fetch values from Original Order to Return Lines
- Convert Shipment cost to freight charge in Order Management and then send it to Invoicing
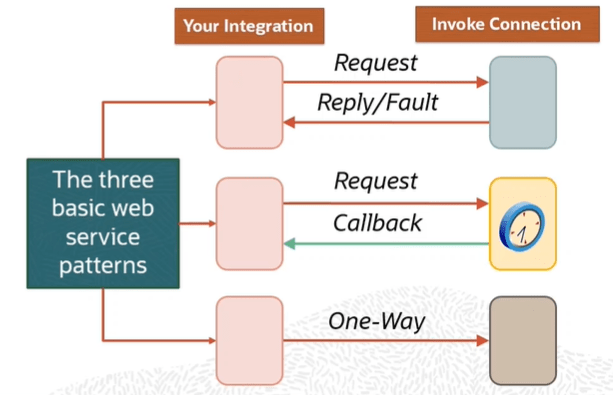
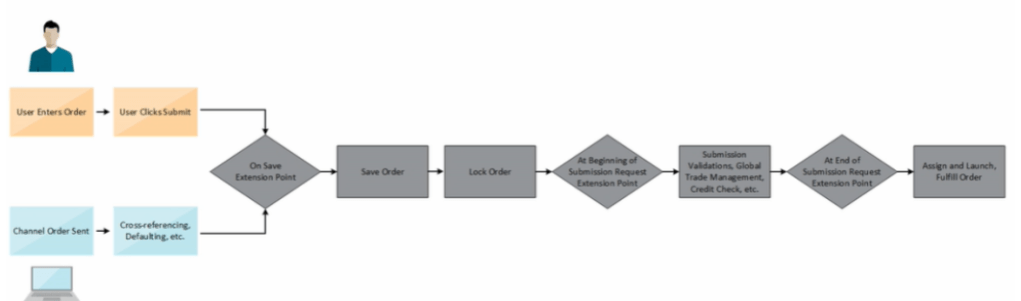
- Below is the flow of Order Management Extension. Extension comes into play
- At Beginning of Submission Request
- During Submit Request
- At end of Submission Request
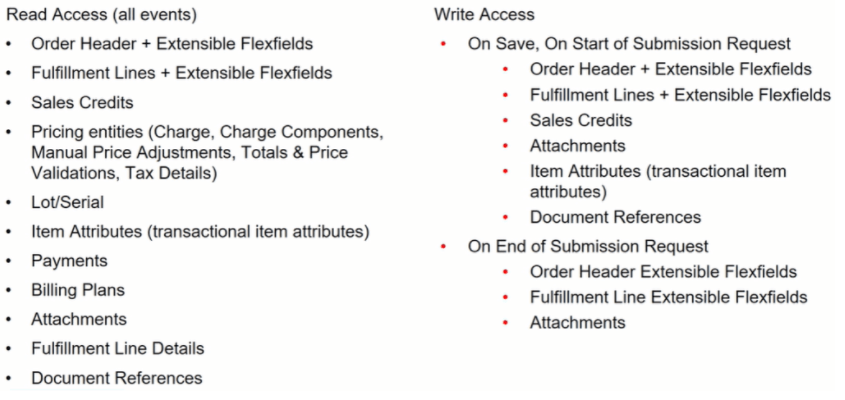
Order Management Extensions : Data Available for Read/Write

Order Management Extension: Read and Write Access
Order Management Extension : Filtering lines in Extensions, Rules and Constraints
- Make sure we filter out lines that we don’t want to process when we create an Order Management Extension, Business Rule or Processing Constraint.

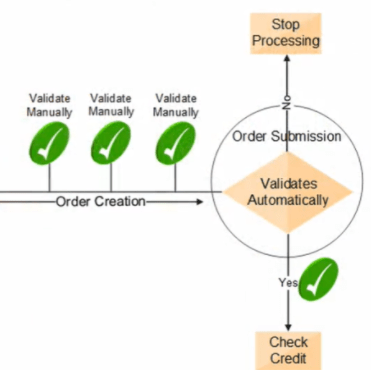
Validations of Order
- Before Submission, we can validate Order Manually
- At Submission, Order Management Validate Sales Orders Automatically
- Verifies required attributes
- Check errors related to constraints, pricing, configuration and Taxes
- If the Sales Order Validation
- Passes, then the process checks the credit, (if this step is part of the Orchestration process)
- Fails, then processing stops and the order is in Draft Status
Global Trade Management
If GTM is integrated with Order Management, then GTM may perform below actions upon Order Submission
- Verify that Sales order passes any Trade Compliance rules that is setup in Organization
- Screen for Export Compliance
- Determine License
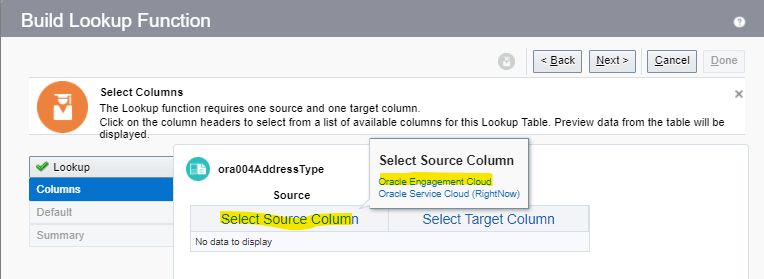
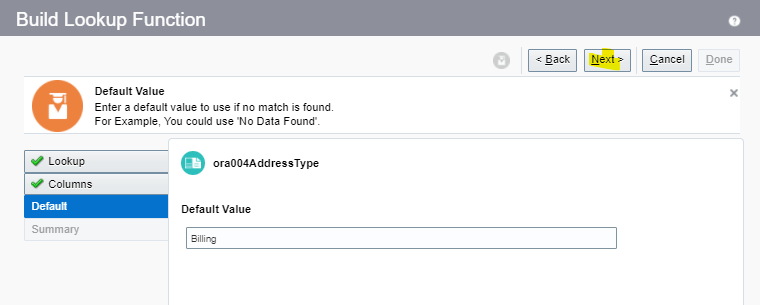
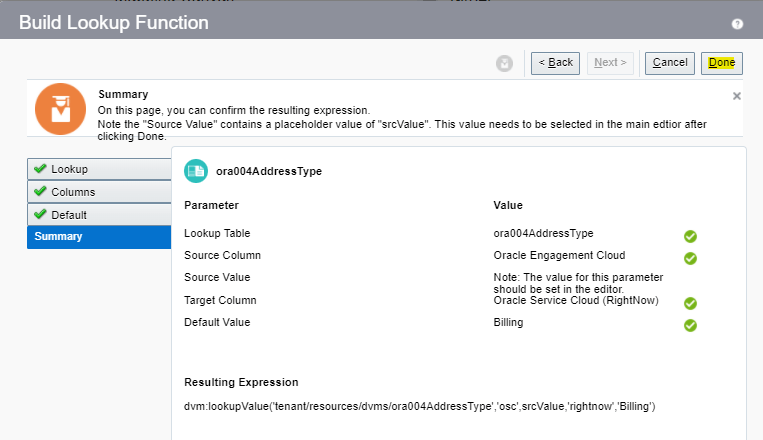
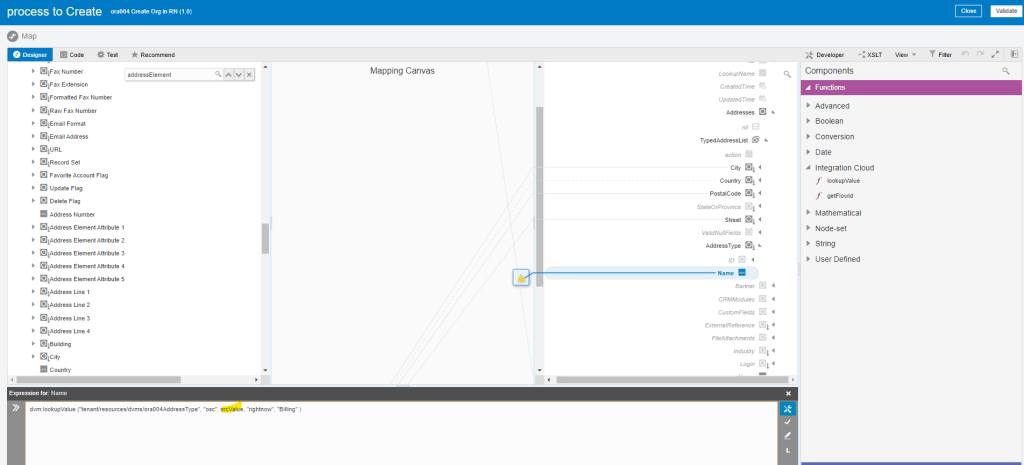
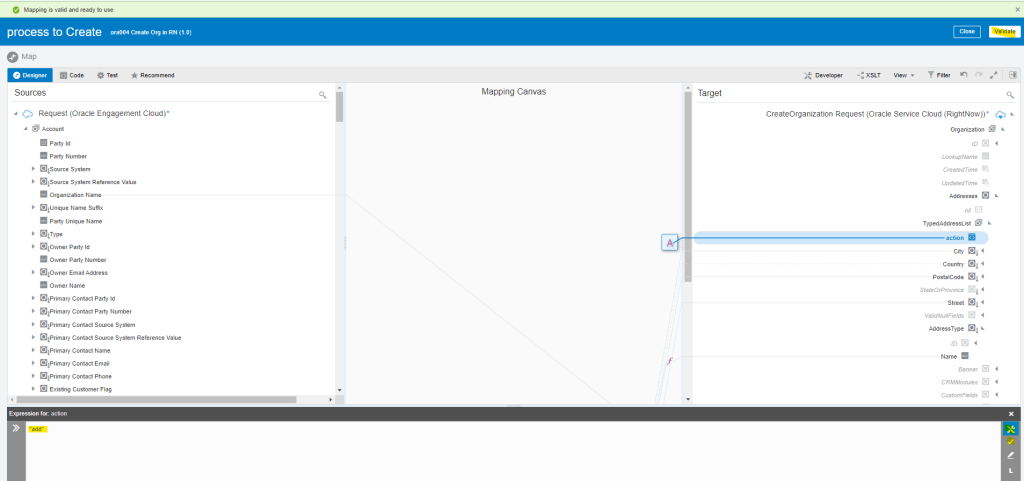
Service Mappings
Gives us the ability to pass data from an attribute or Extensible Flexfield in Order management to a descriptive flexfield or Interface column in following Oracle Fusion Fulfillment Systems
- Shipping
- Receiving
- Receivables
- Purchasing

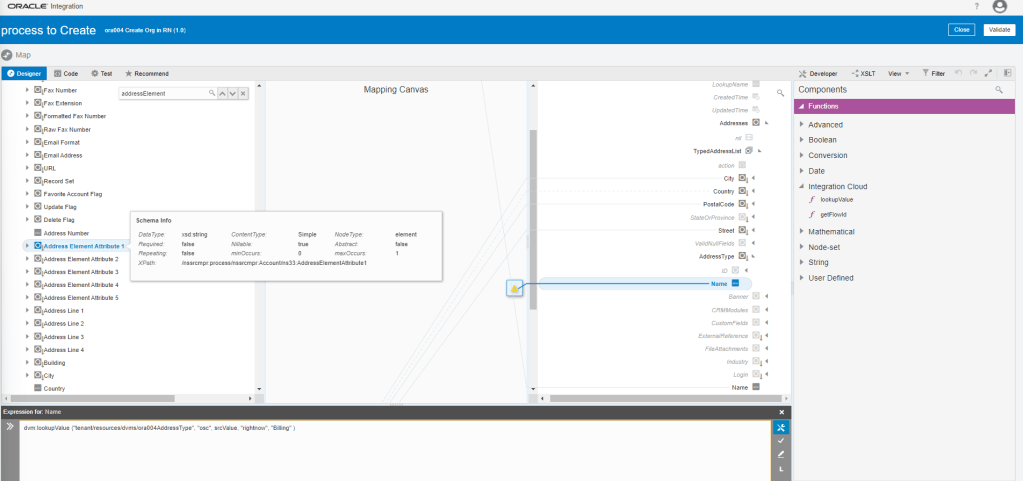
Service Mappings : Flow

Service Mappings : High-Level Setup Steps
Below are the High Level Setup Steps
- Get values that identify the attribute.
- Use the Manage Service Mappings Page to map the attributes or Extensible Flexfields to Descriptive Flexfields or Interface Columns

- Use the Manage Algorithms page to include additional Logic or Mapping Information from a different level, for example
- From Order Header to Invoice Interface Line
- From Extensible Flexfields to Interface Line

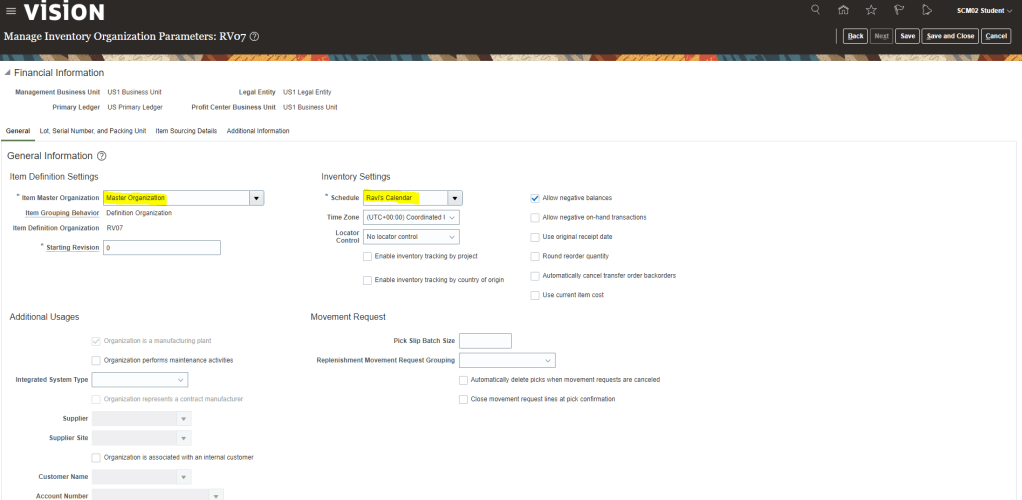
Order Management Parameters
These Parameters affect most or all of the Order management Cloud