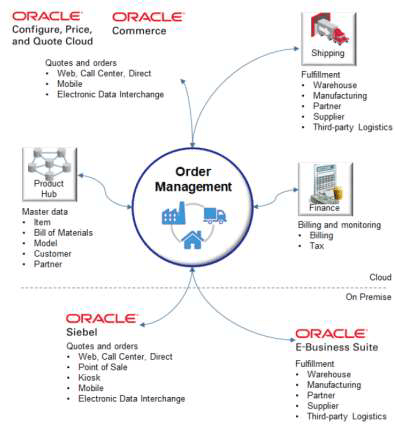
What is Shipping
Shipping is one of the essential process where in Order is shipped from warehouse. Warehouse receive the total quantity of order in form of Shipment number. Each shipment could
- Generated for all lies of one single order
- OR single order could be split into multiple shipments based on either schedule ship dates for each lines, quantity or availability of Stocks for each lines
- OR many orders clubbed into one shipment based on shipping address, schedule ship dates or item
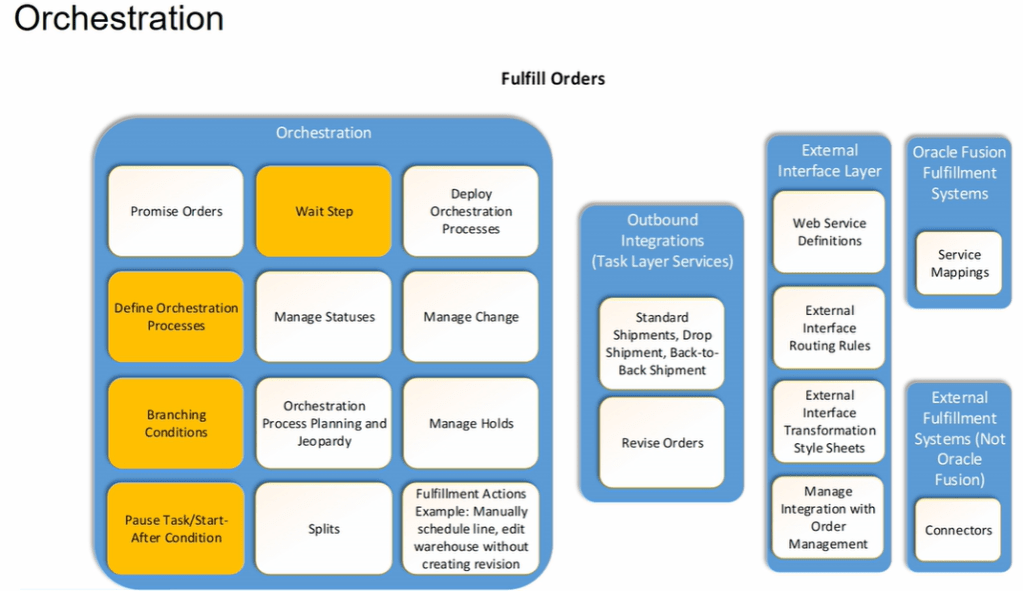
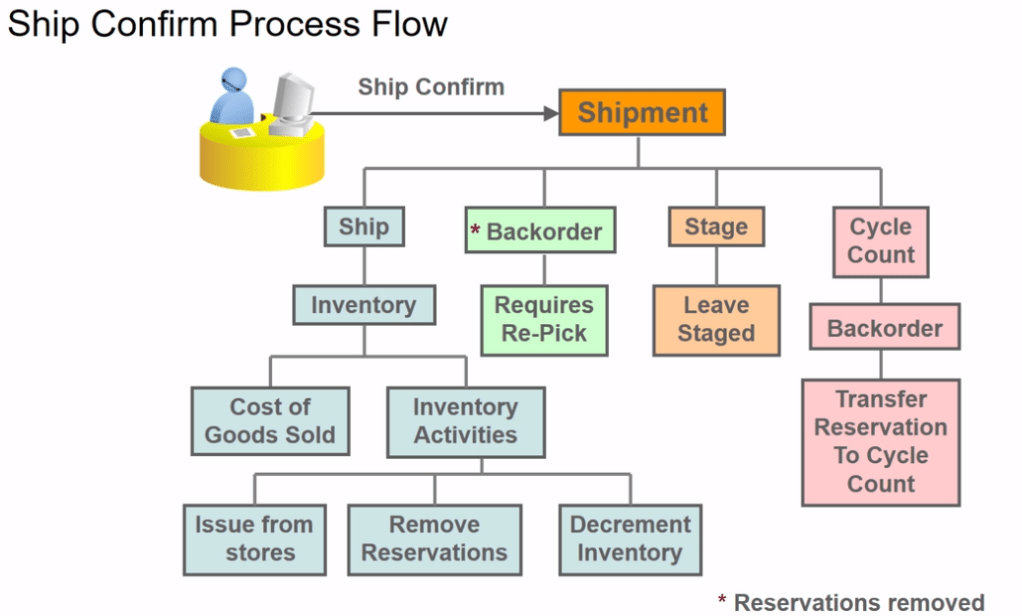
Below is the description of Ship Confirm process flow which happens in warehouse.
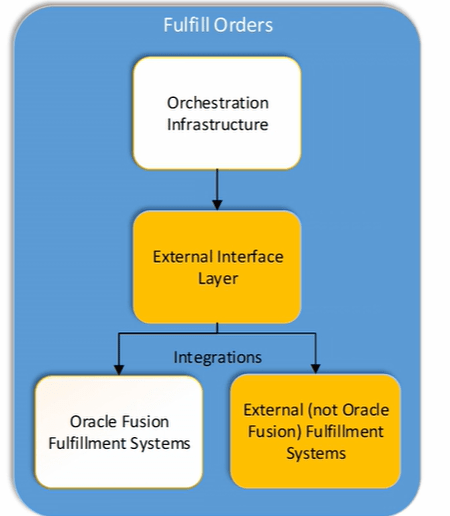
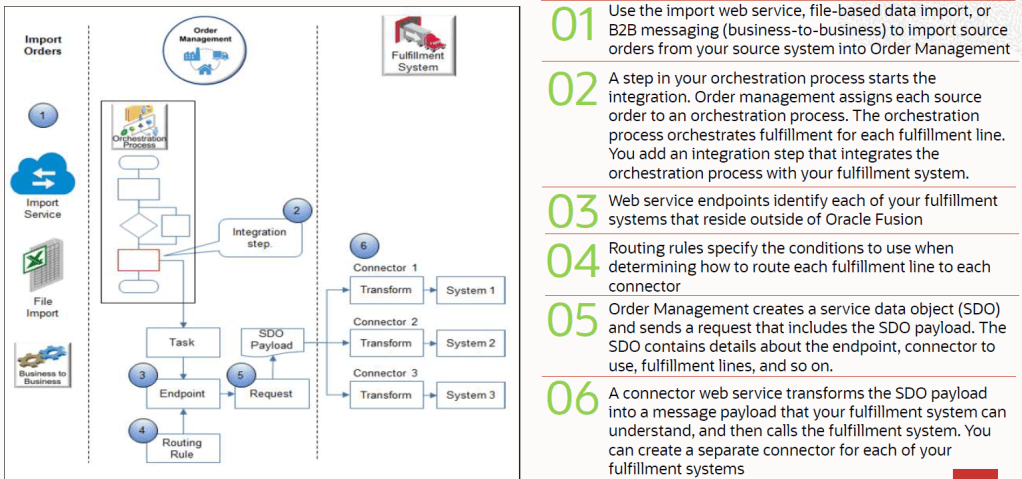
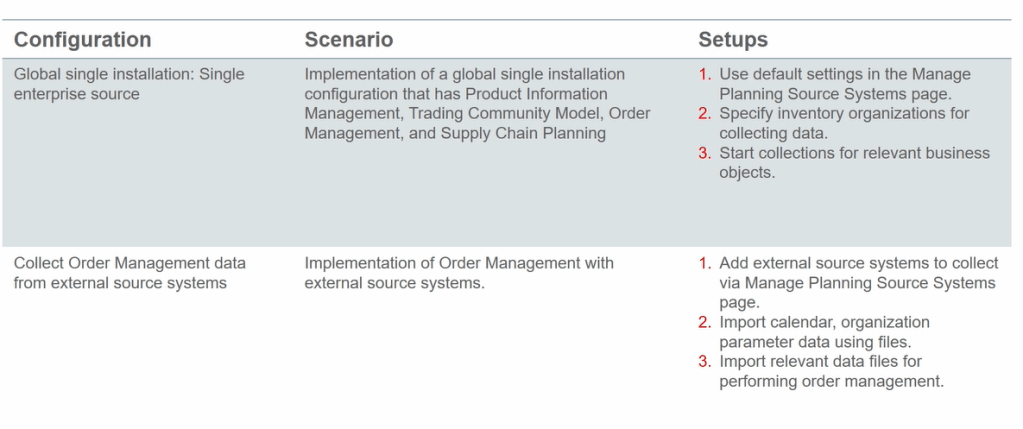
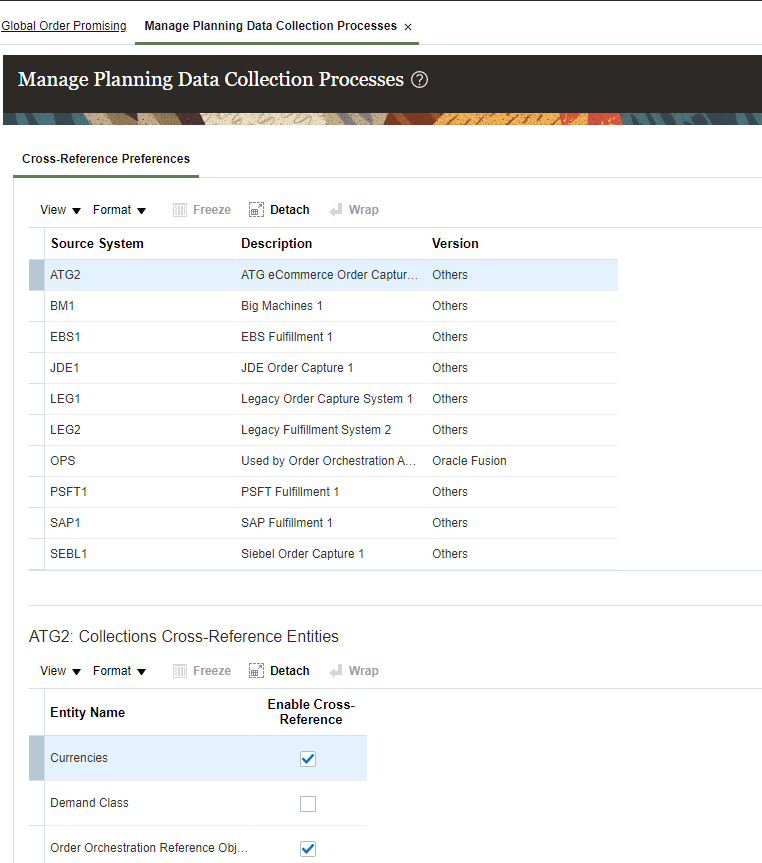
Shipping in Order Management can happen Internally within fusion or Externally with other Fulfillment System
- Shipment process happening internally within Fusion.
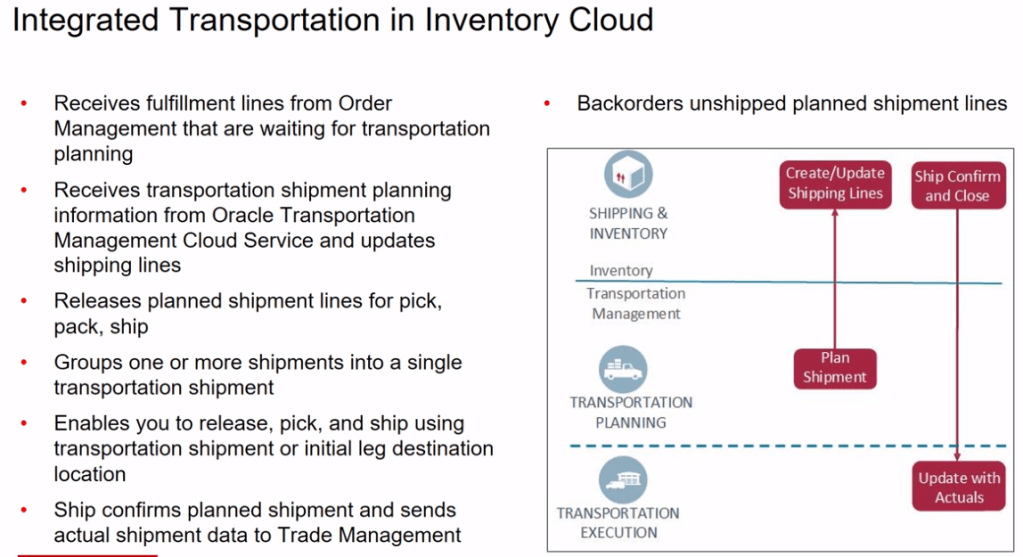
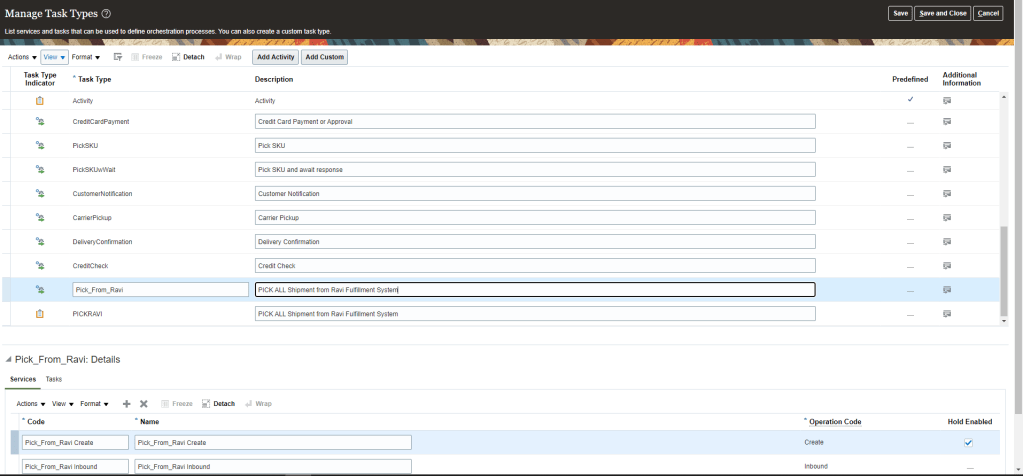
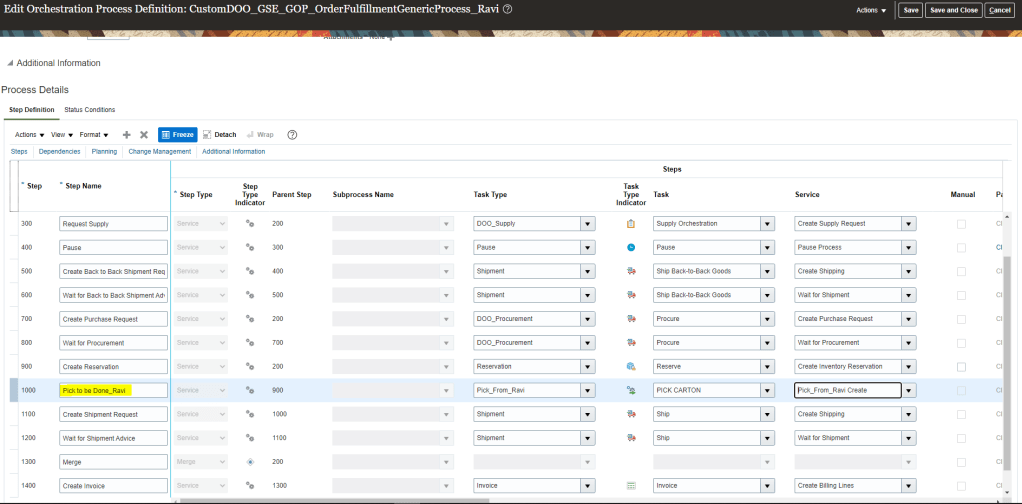
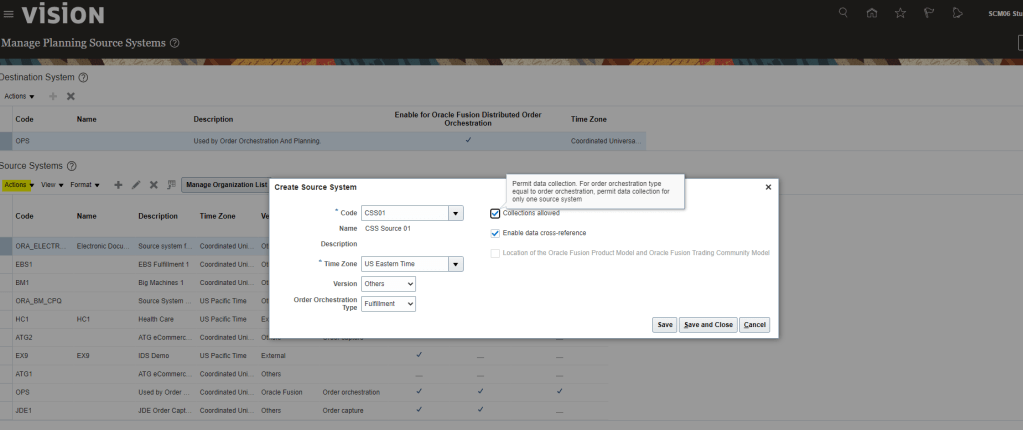
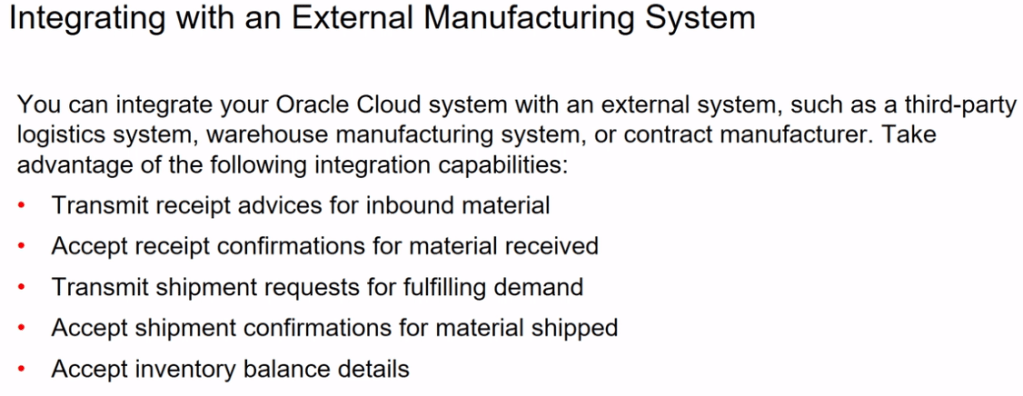
- Shipment process happening outside fusion.
Different Roles in warehouse for Shipping
Within warehouse each person has designated roles with designated function to perform.

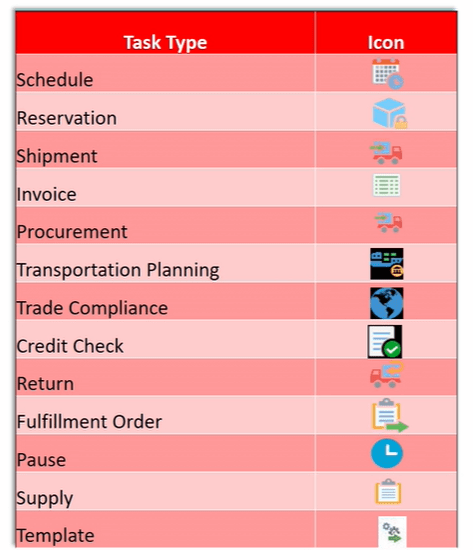
Trade Compliance
Shipping process needs to follow trade compliance which needs to stick to Government and Company rules and regulations.

Necessary Setups for Shipment Process.
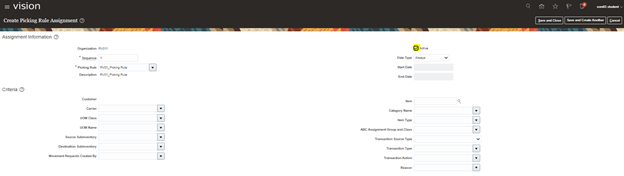
Step 1: Create Release Sequence Rule
It is used to determine sequence of pick release of all orders from Order Management. Orders are pick released in batches and needs to be sorted based on certain criteria. Release sequence rules determines those criteria.

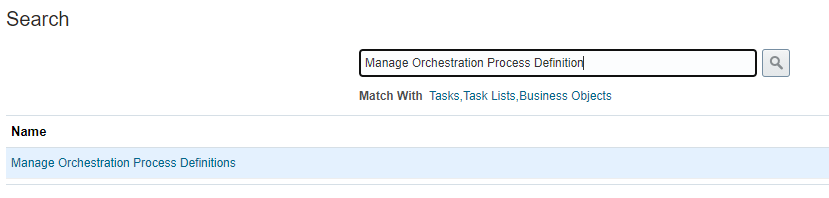
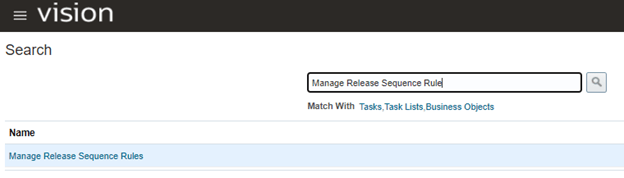
- Navigation -> Go To Setup and Maintenance -> Click on Task Pane Carousel -> Click on Search.
- Enter Task “Manage Release Sequence Rules”.
- Click on + Button.
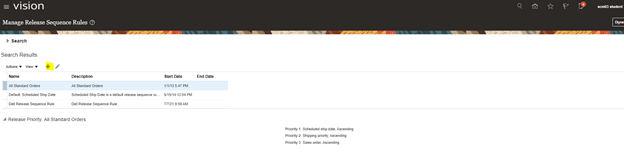
- Choose Parameter based on which you want Incoming transaction to be Sorted and in which order.
- In below case its sorted based on “Sales Order” in Ascending Order.

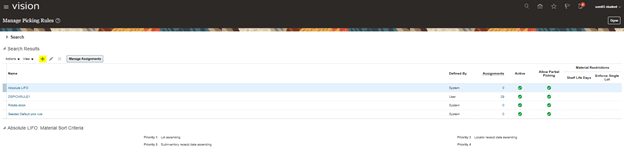
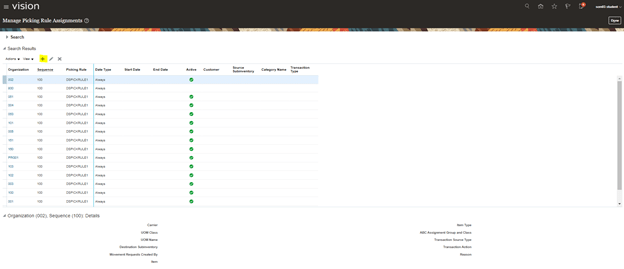
Step 2: Create Pick Slip Grouping Rule
It is used to determine on what basis Order needs to be grouped. Be it at destination location or customer or Order Level.

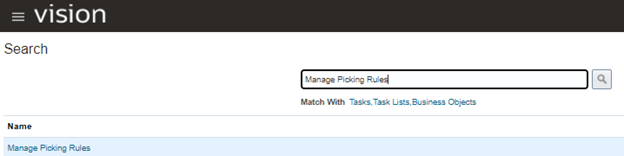
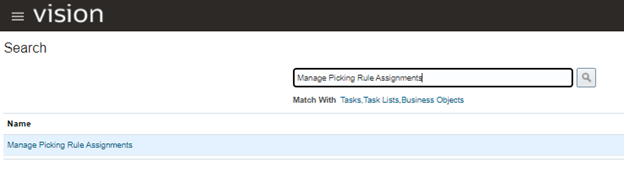
- Navigation -> Go To Setup and Maintenance -> Click on Task Pane Carousel -> Click on Search.
- Enter Task “Manage Pick Slip Grouping Rule”

- Click on + Button.

- Pick slip is grouped based on Order Number.

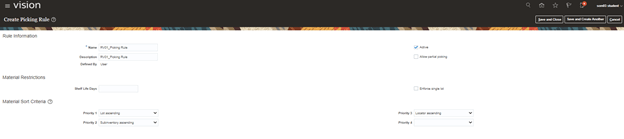
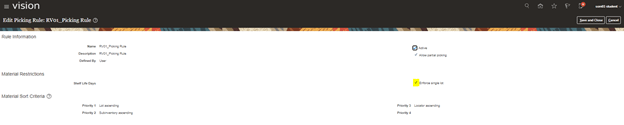
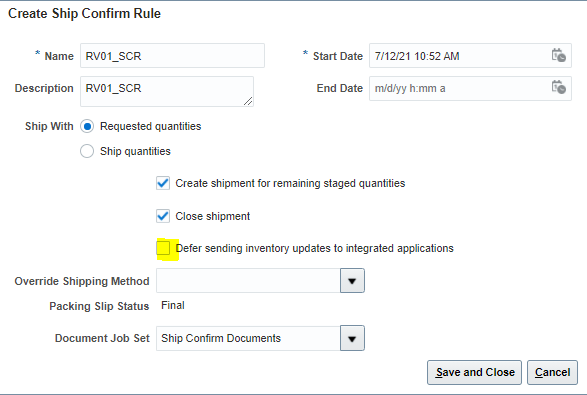
Step 3: Create Ship confirmation Rule.
It is used to determine on what basis Order needs to be grouped. Be it at destination location or customer or Order Level.
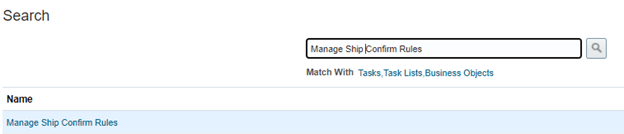
- Navigation -> Go To Setup and Maintenance -> Click on Task Pane Carousel -> Click on Search.
- Enter Task “Manage Ship Confirm Rules”
- Click on + Button.

- Ensure Defer Sending Updates is marked Unchecked.
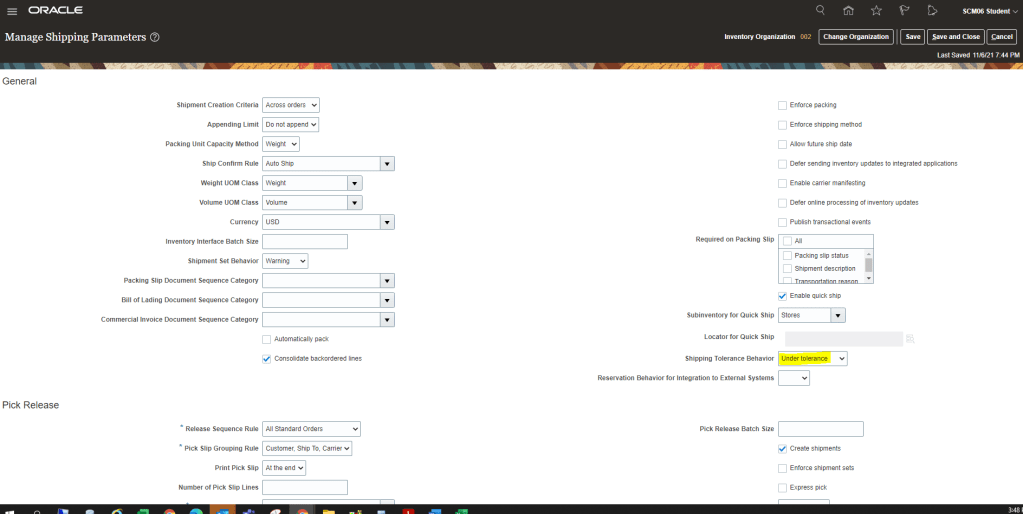
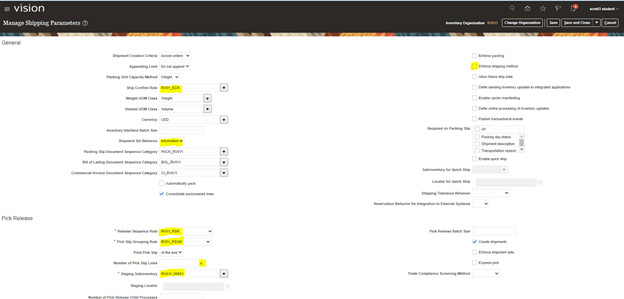
Step 4: Create Shipping Parameters at Organization level.
It is Organization Level entry setup which uses setup created from Step 1 to Step 3. Using Shipping Parameters
- Navigation -> Go To Setup and Maintenance -> Click on Task Pane Carousel -> Click on Search.
- Enter Task “Manage Shipping Parameters”
- Create Entry with Highlighted fields as Mandatory entry. Ensure to uncheck “Enforce Shipping Method” else Transit times become mandatory.

- At Source Level RV011
Step 5: Create Carrier
- Navigation: Go to Others -> Setup and Maintenance -> Manufacturing and Supply Chain Materials Management -> Enter Task “Manage Carriers”.
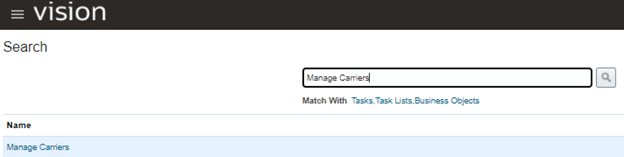

- Go To Actions -> Enter Carrier Name “RV01_Carrier”. Ensure Active should be Enabled.
- Go to Shipping Method -> Actions -> Add row -> Enter Service Level “2Day”, Mode of Transport “Air”, Active “Yes”

- Add Child organization to the Carrier.

Shipment Process Life Cycle
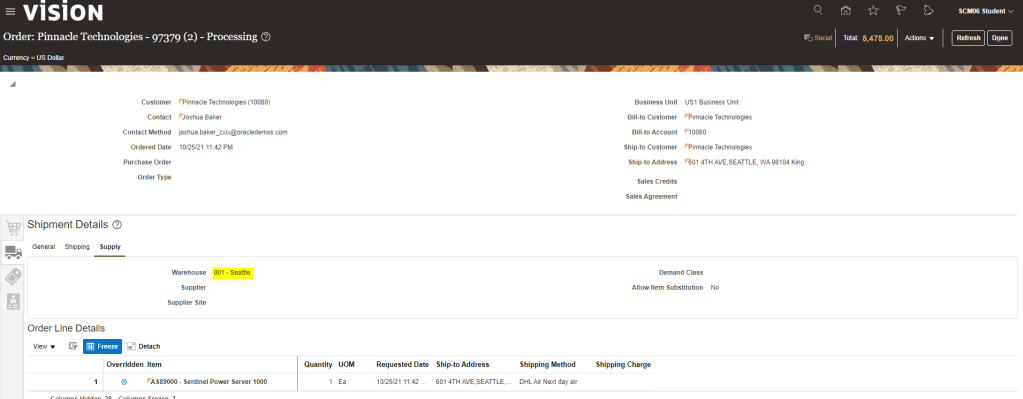
Step1 : Create Order
Ensure Status of each line is Awaiting Shipping.

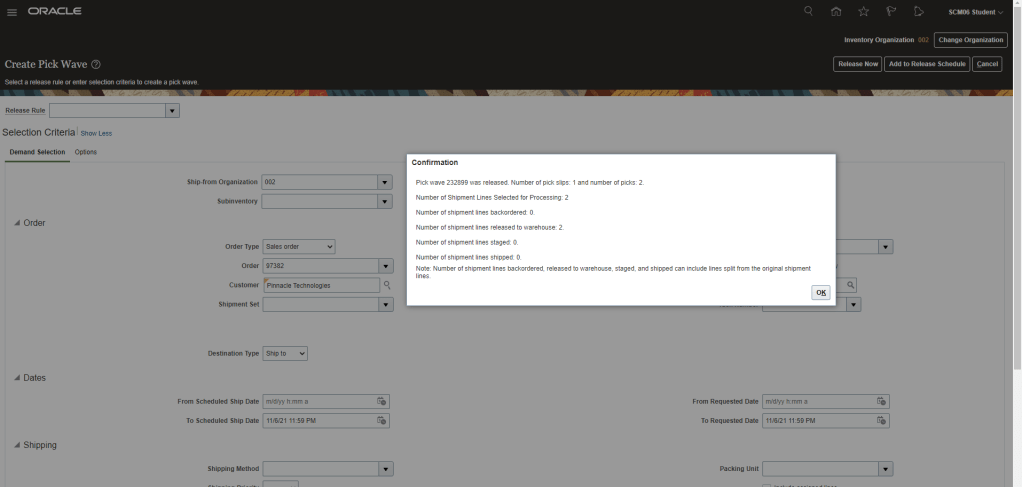
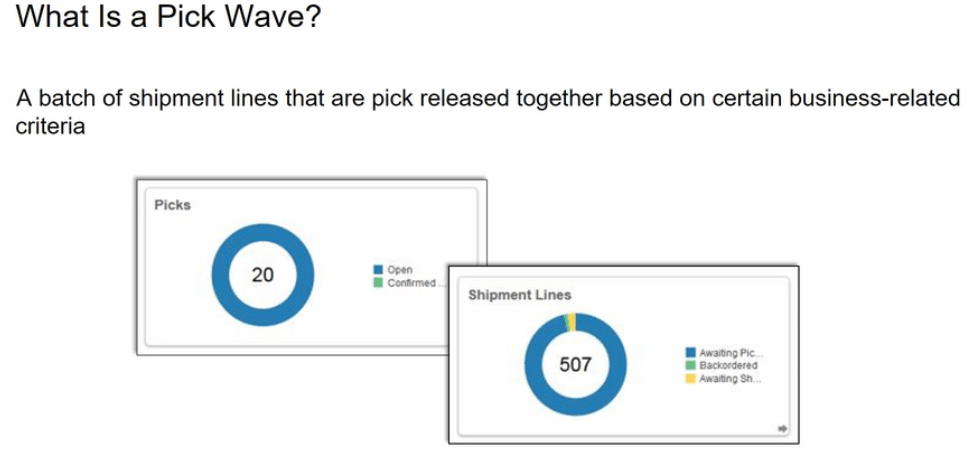
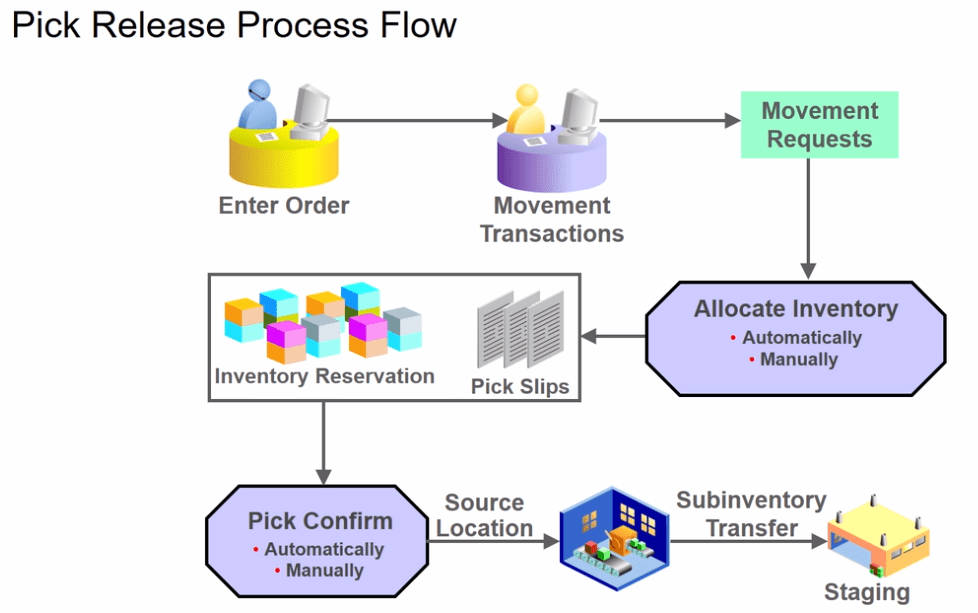
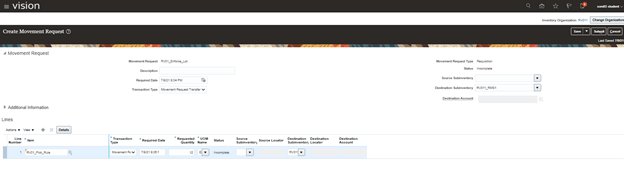
Step 2: Create Pick Wave
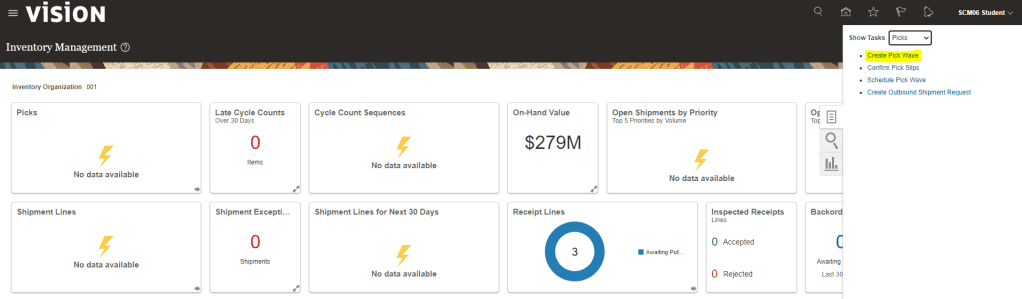
- Navigation: Go to Supply Chain Execution -> Inventory Management -> Task Panel on Right -> Go to Shipment -> Create Pick Wave
- Enter Order Type, Order Number
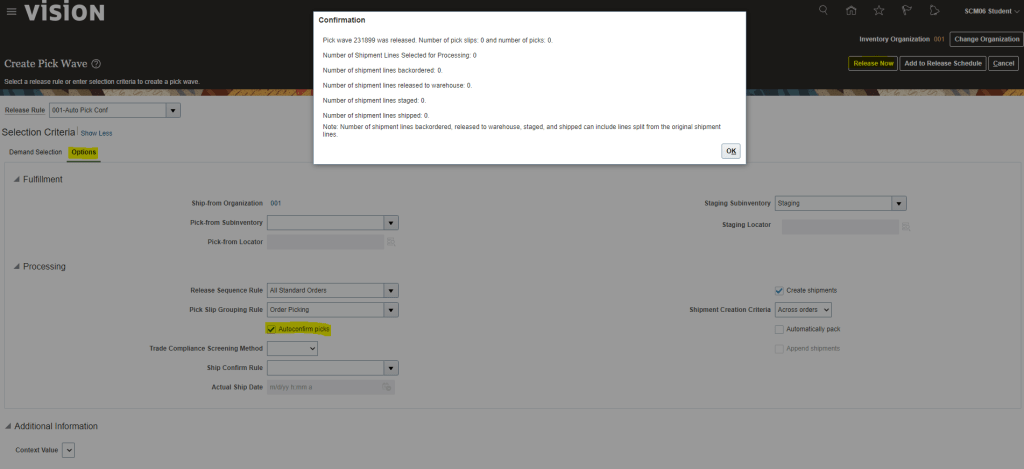
- On Selection Criteria -> Click on Show More -> Enter Order type and Number if not added -> click on Options
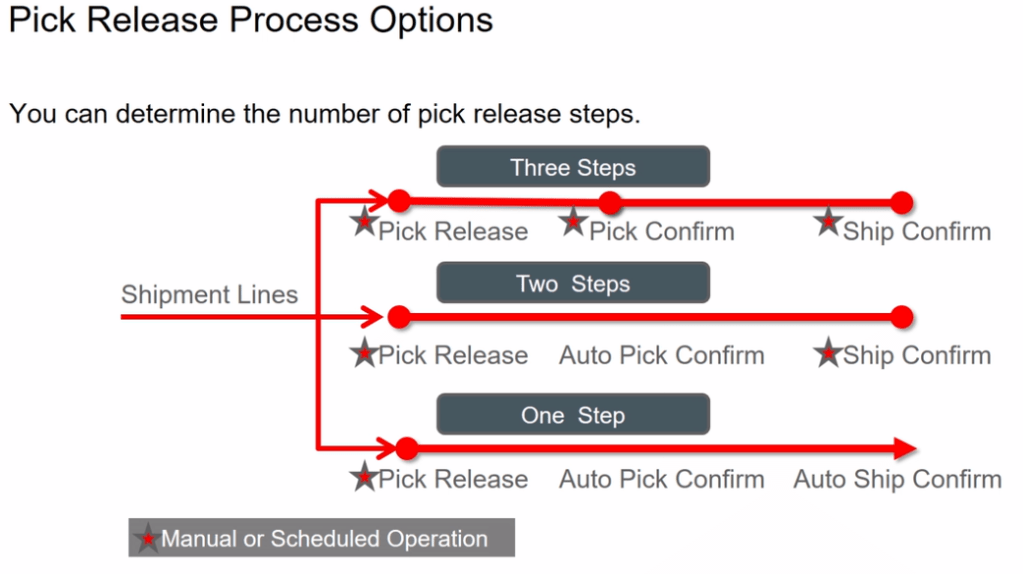
- Click on AutoConfirm Picks
- Click on Release Now
- Pick wave ID, no of pick slip has generated will get displayed
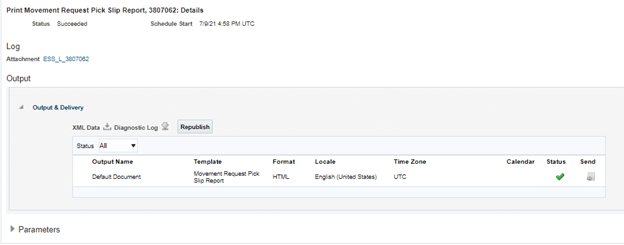
- Go To scheduled Process, Pick Release document should be running and finally has to be in Succeeded Status
- Click on View log to see the logs
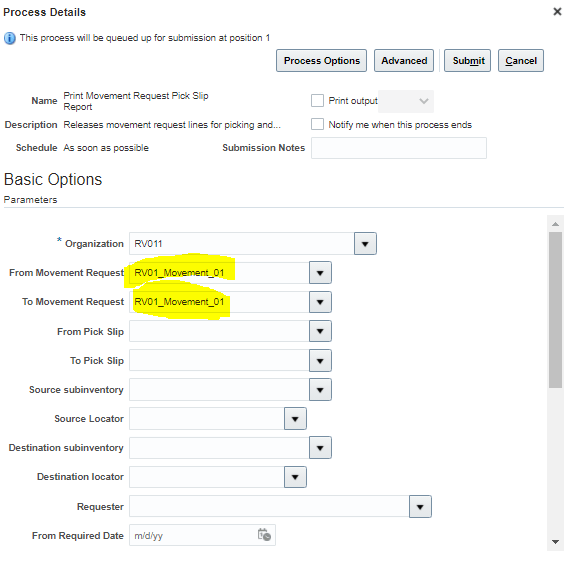
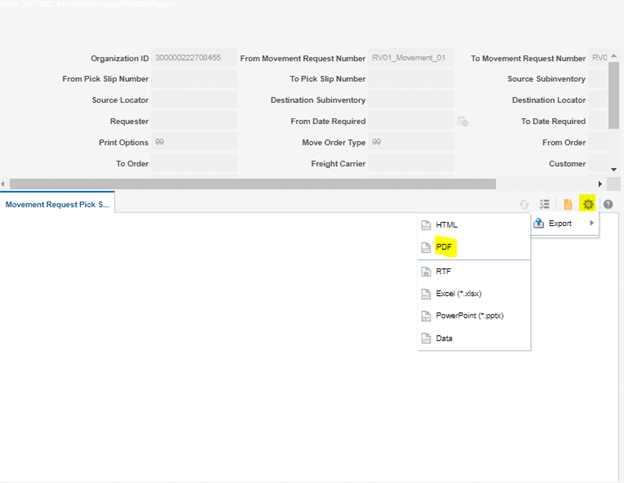
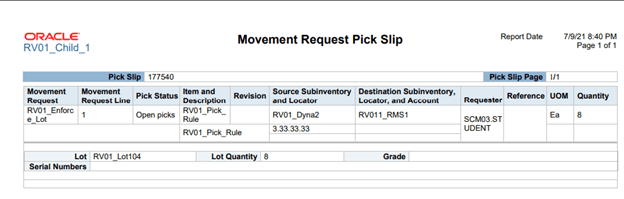
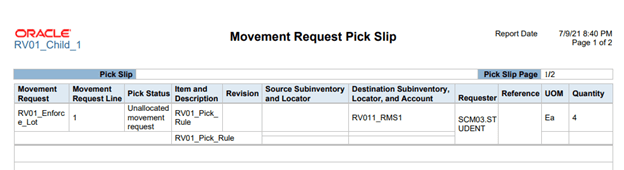
- See logs of Print Pick Slip Report
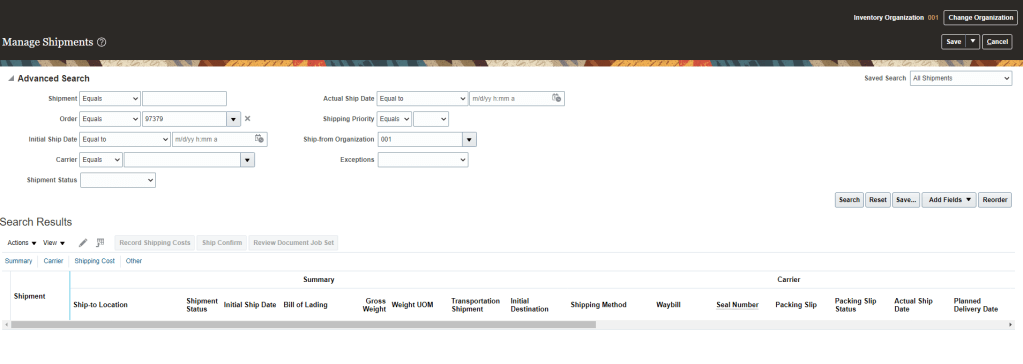
- Go to Shipment section, enter order number and see the shipment id. At line level , status should be Staged.

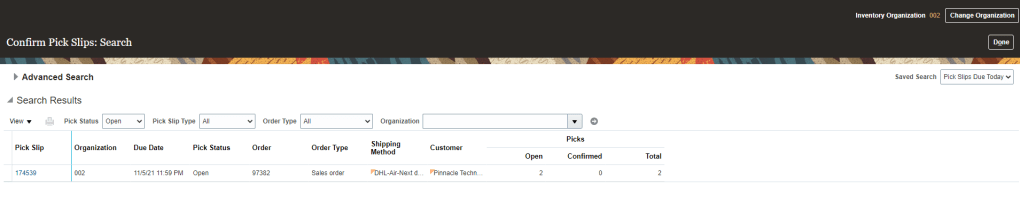
Step 3: Confirm Pick Wave
- Navigation: Go to setup and Maintenance -> Enter task “Manage Inventory Organization Parameters” -> Item Sourcing Details. Under Picking Defaults -> Pick confirmation required should be True
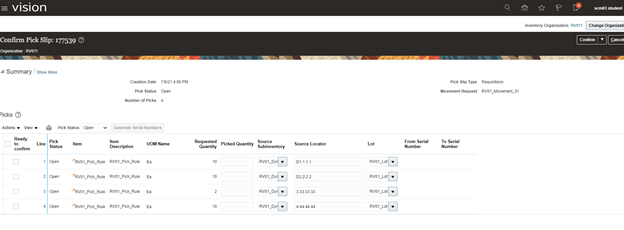
- Go to Supply Chain Execution -> Inventory Management -> Task Panel on Right -> Go to Shipment -> Confirm Pick Slips
- Enter Order Type , Order Number
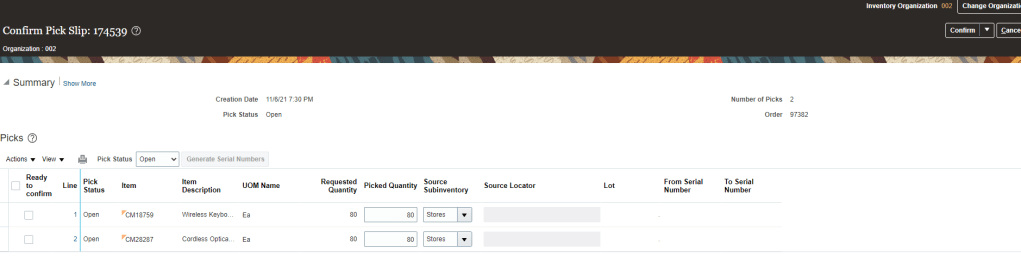
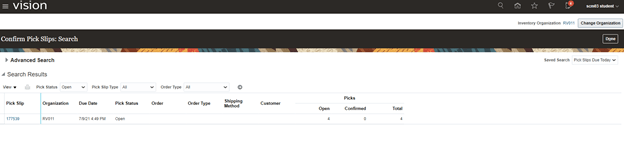
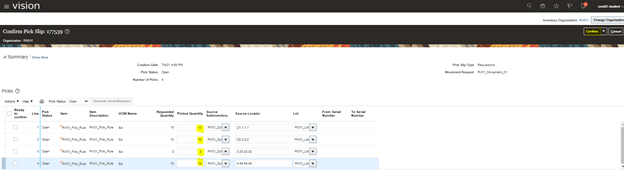
- Pick Slip screen will appear
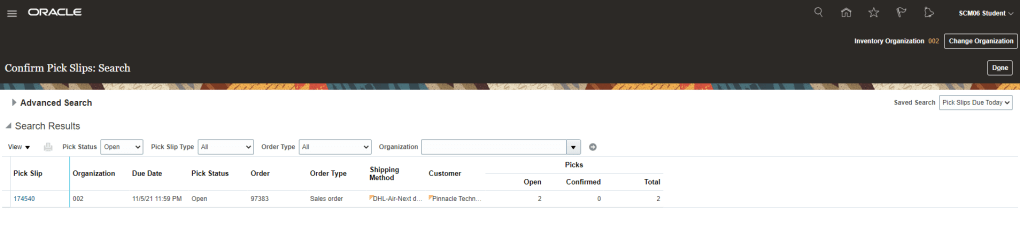
- After checking on box “Ready to Confirm” we have two options either choose “Confirm Pick slip” or “Confirm and Go to Ship Confirm”.
- Lets select “Confirm Pick Slip”. Pick slip number “174540” gets confirmed.
- Go To scheduled Process, Pick Release document should be running and finally has to be in Succeeded Status
- Click on View log to see the logs
- See logs of Print Pick Slip Report

Step 4: Ship Confirm the order
- Go to Supply Chain Execution -> Inventory Management -> Task Panel on Right -> Go to Shipment -> Select Shipment Lines.
- Enter Order Type, Order Number
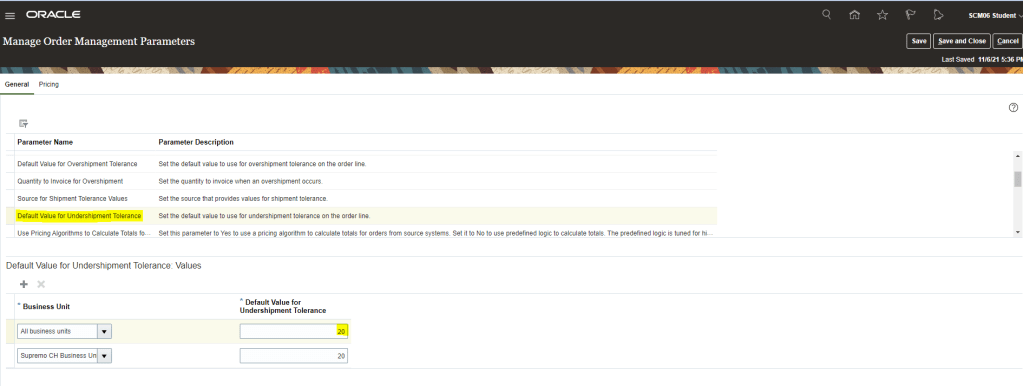
- Once Ship confirm screen appears, enter Shipped Quantity. There is a different flavor of entering Shipped quantity which is different from Order Quantity, its called Shipped Tolerance.
- On right hand corner there is option for Ship Confirm
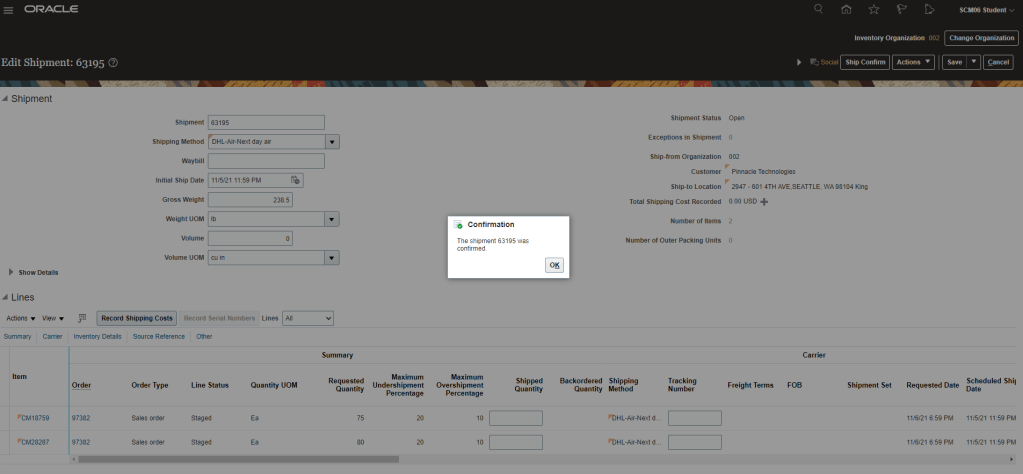
- Click on Ship Confirm and press enter.
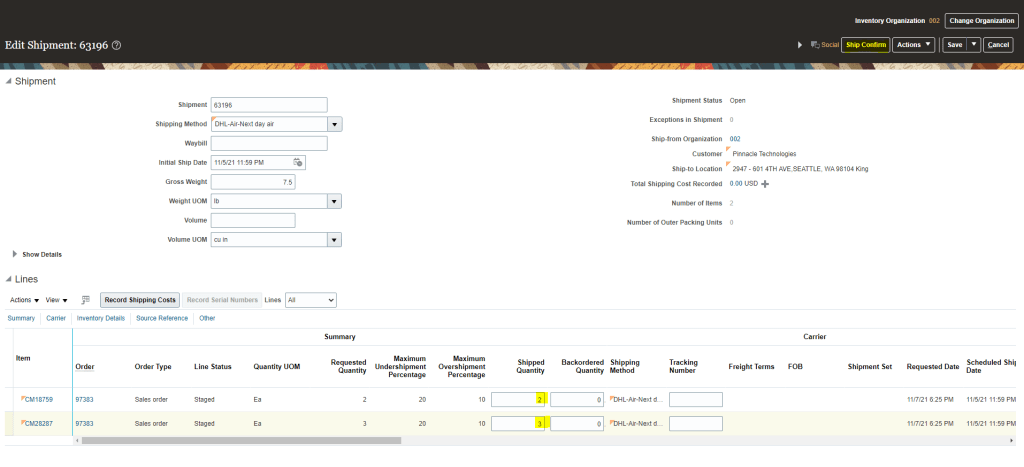
- Shipment number 63196 gets created.

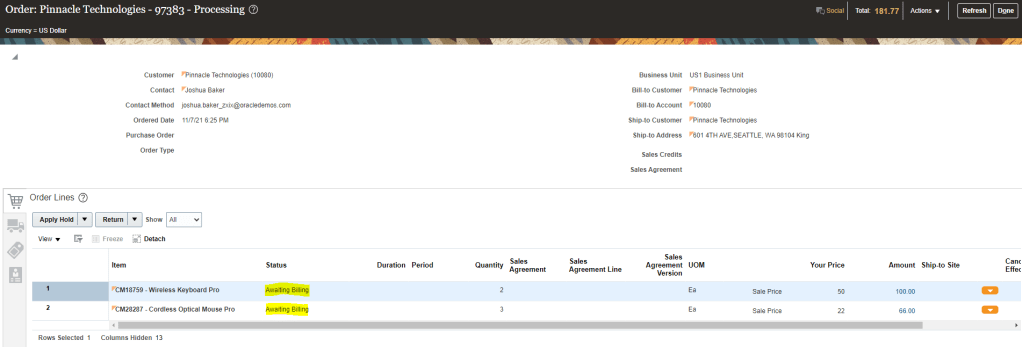
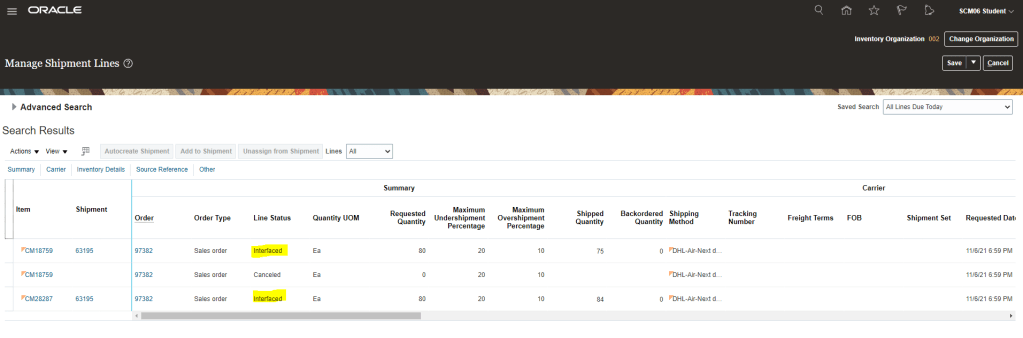
Step 4: Verify Status of Order Line
- After shipment, Order line status will be “Shipped” and later on it will change to “Awaiting Billing“.

- After certain moment it will change to “Awaiting Billing“.