What is Jeopardy: It is a alert which helps Business to take necessary action on order in case they see any potential delay in fulfilling the Order. It can also be considered as risk in fulfilling the order.
Order fulfillment comprises of different tasks i.e. Shipping, Billing, Invoicing etc. There could be potential delay in shipping an item from warehouse. Which will eventually delay the other activities. This is where Jeopardy comes into picture. It evaluate time taken at each level and if it is beyond permissible lead time, it raises a flag. Flag(Jeopardy) has different level of severity. Higher the Jeopardy is when Business has to chime in and investigate what is causing potential delay and what can be done to expedite steps of particular order.
Jeopardy has two Components/Setups
- Manage Jeopardy Priorities
- Manage Jeopardy Threshold
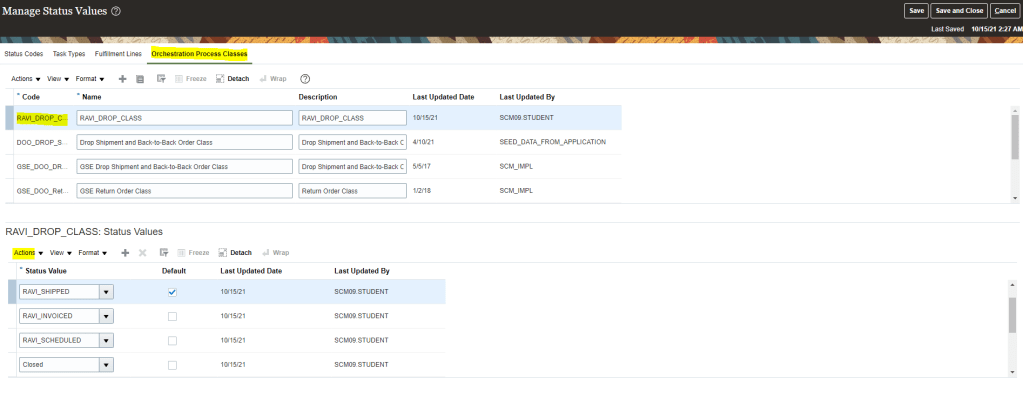
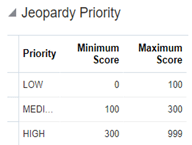
Manage Jeopardy Priorities
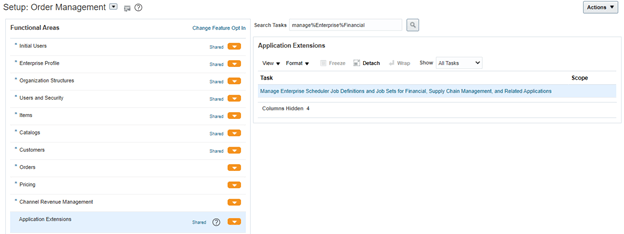
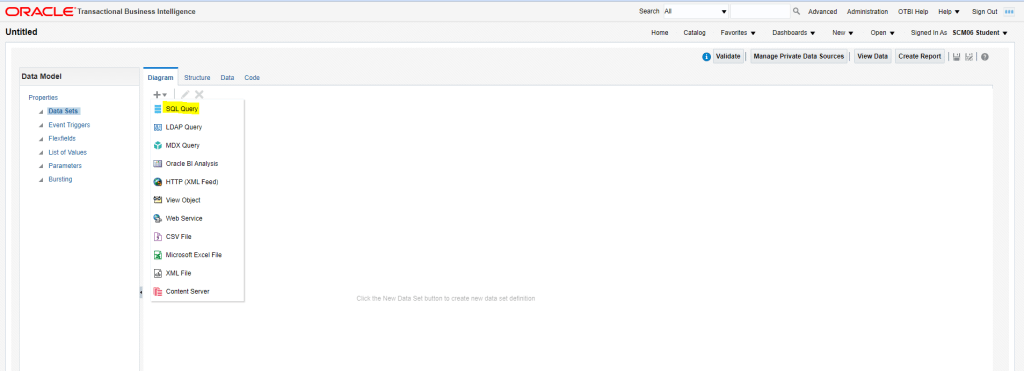
- Navigation: Go to Others -> Setup and Maintenance -> Order Management -> Enter Task “Manage Jeopardy Priorities”
- Minimum and Maximum scores determine what priority it will fall under(Low, Medium or High)
and same is used at time of creating Jeopardy Threshold. Score is set based on business needs.
Manage Jeopardy Threshold
Jeopardy priority is used as a reference to determine
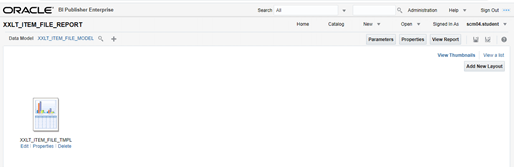
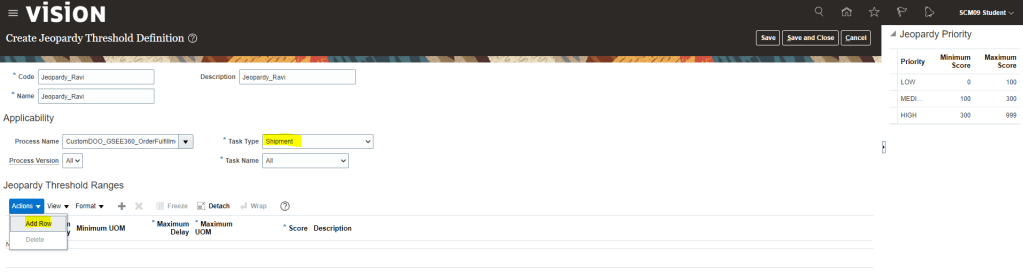
- Navigation: Go to Others -> Setup and Maintenance -> Order Management -> Enter Rules(Manage Jeopardy Threshold).
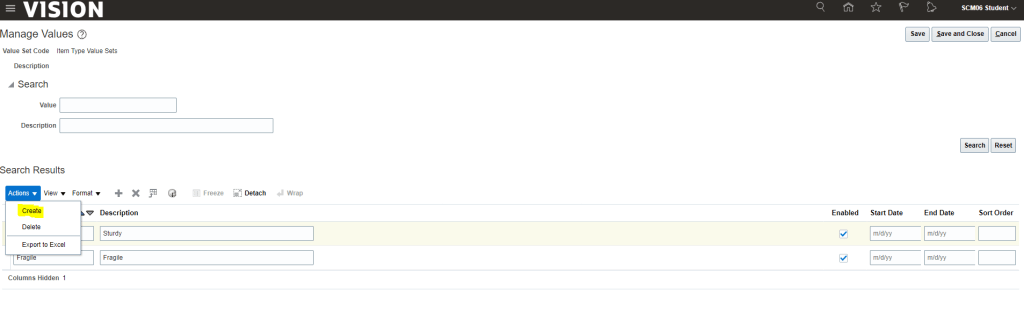
- Under Action Select Create if we wish to create new Thresholds, else select Edit to update existing thresholds.

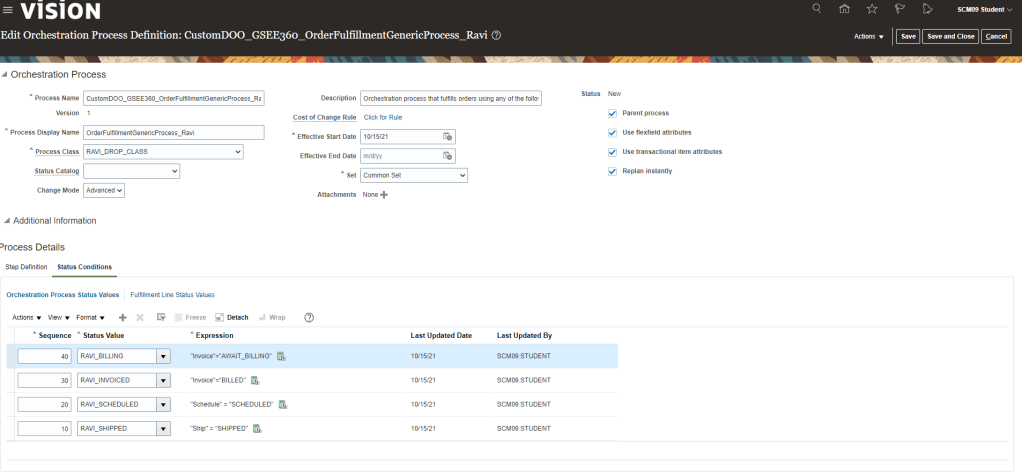
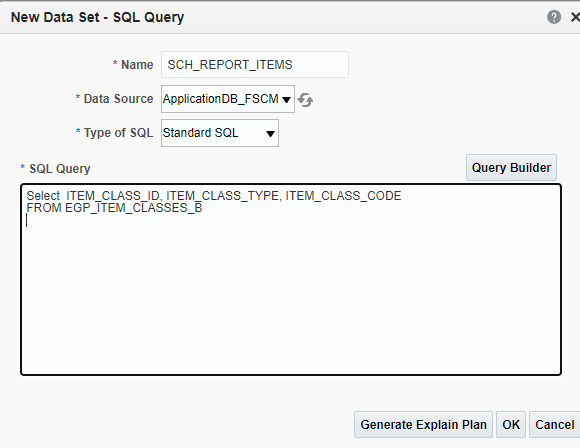
- Code -> Enter Code for your Jeopardy Threshold Definition.
- Name -> Enter Name for your Jeopardy Threshold Definition.
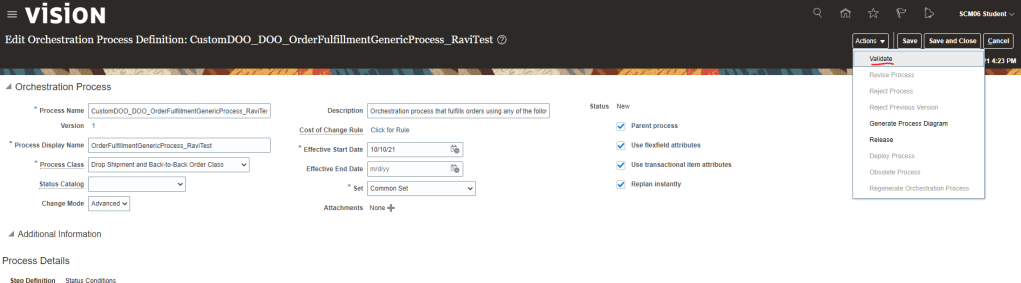
- Process name -> Enter Process name given at time of Orchestration Process Definition.
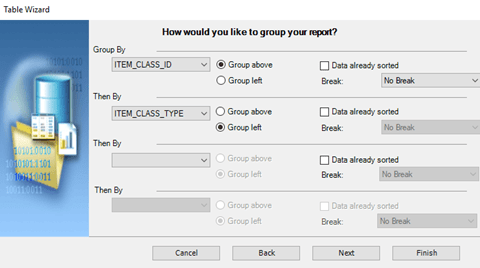
- Task type -> where you want this threshold to be applicable. It can be set to All or if want this Jeopardy to be set for specific task i.e. Shipment.
- Task Name -> If we select any particular Task type, then respective Task Name will show in drop down. We can select All or any specific task name for which we want this threshold to be applicable
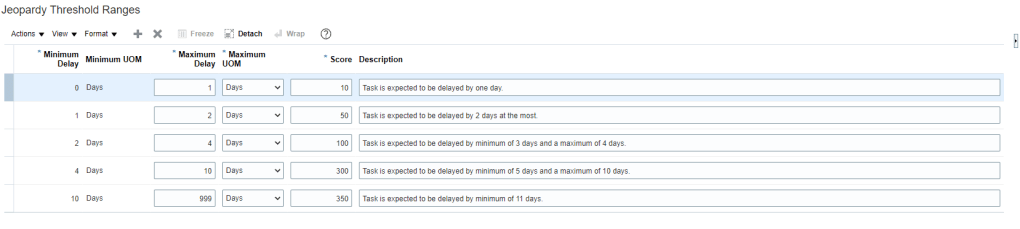
- Under Action Button, Select Add row.
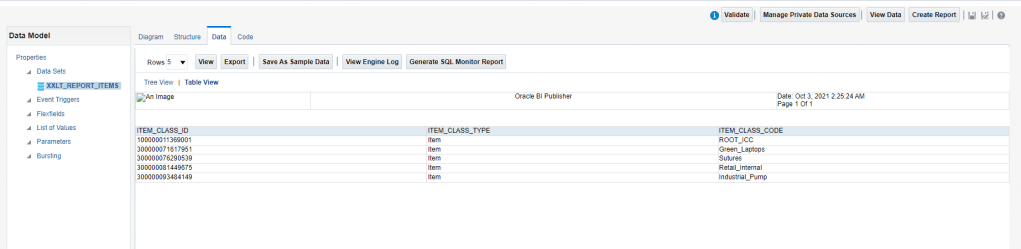
- Based on Business provided values we can setup the threshold Ranges
When Jeopardy runs
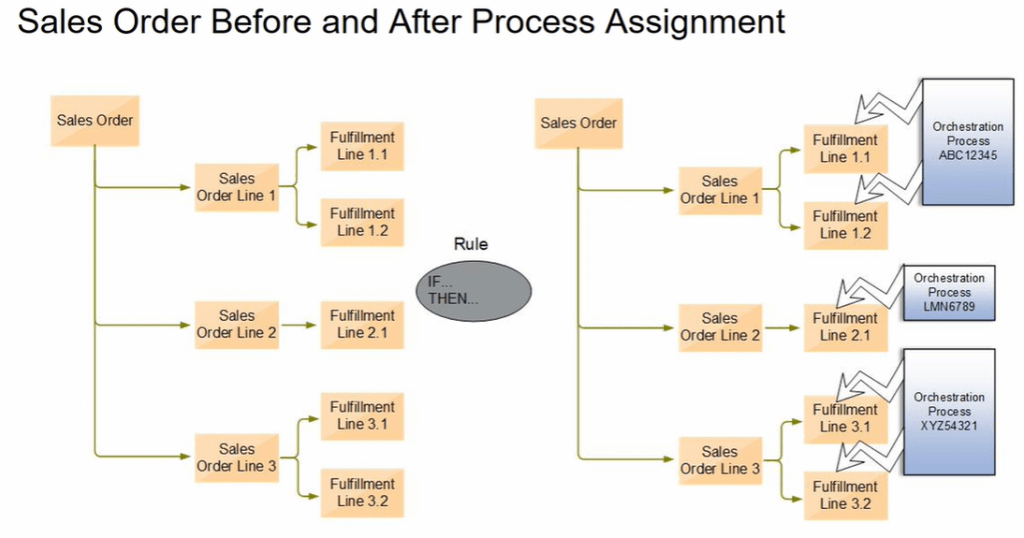
- When an orchestration process is assigned to an order line, the process is planned taking into account the lead time of steps in the orchestration process and certain key dates from the sales order, such as required completion date.
- Each task of the process has a planned start and completion date.
- The orchestration process is re-planned, when a task completes or when the scheduled process runs.
- Jeopardy runs when planning runs, so a task can be at risk and still not appear as in jeopardy because an event hasn’t triggered planning to run.
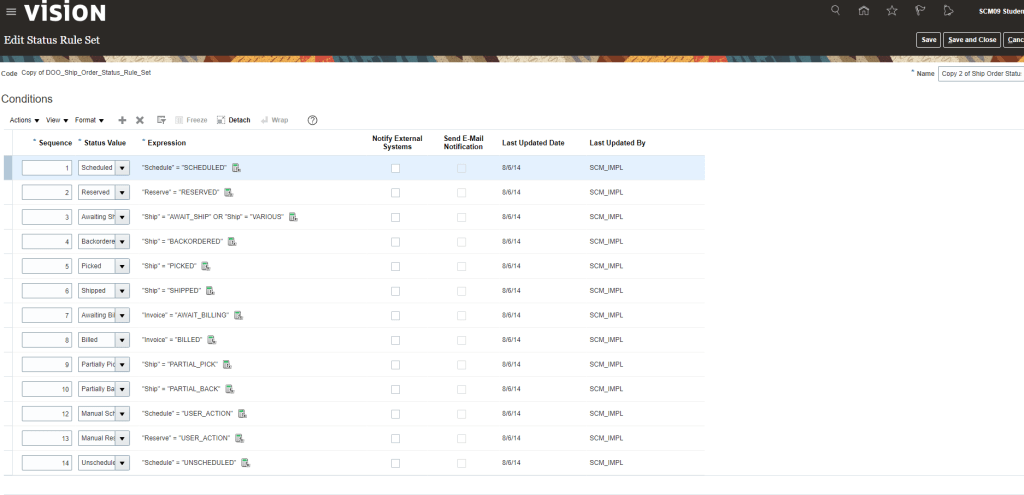
How Jeopardy Threshold is evaluated
Order Management searches for a threshold that applies to the highest number of entities of the task. It
searches for a threshold in this order:
- Process name, process version, task name, and task type
- Process name, process version, and task name
- Process name and task name
- Process name, process version, and task type
- Process name and task type
- Task name
- Process name and process version
- Process name
- Task type
Application of Jeopardy in Order Management
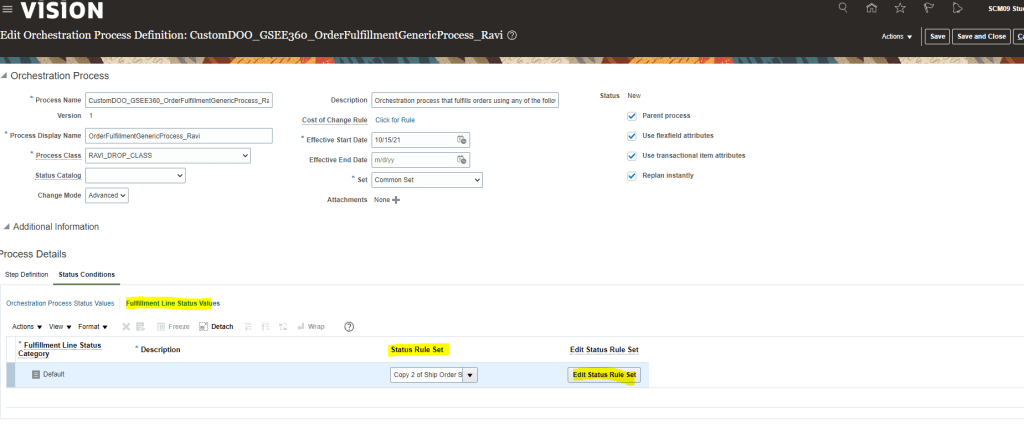
Jeopardy setup using Orchestration Process gets applied by default.
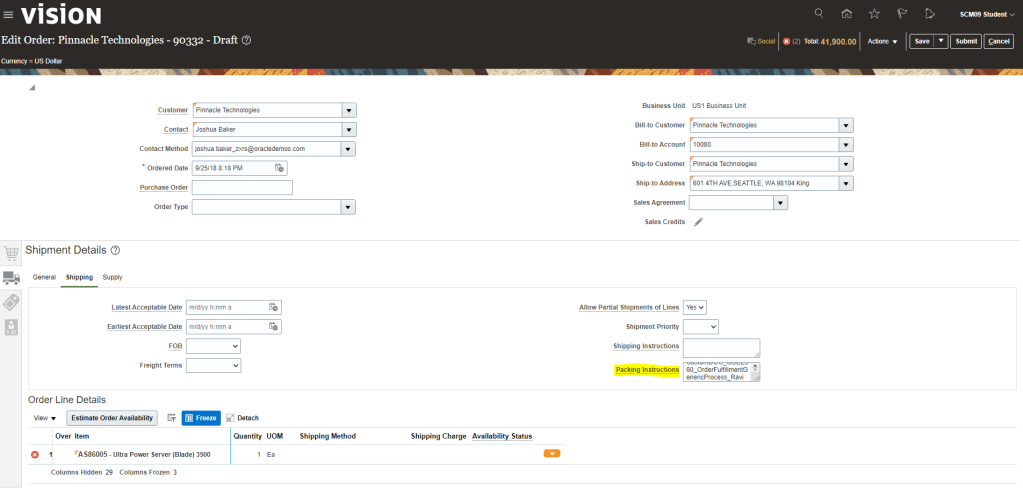
In case we want specific Jeopardy to be applied while Creating order then we need to go to Shipping Truck Icon. Under Shipping tab, Enter Orchestration process Name in Packing Instruction.
This is how Jeopardy thresholds gets picked up.
- Click on Actions -> Switch to Fulfillment Views -> Under Fulfillment Tab we will see Orchestration Process Name assigned to the corresponding Order Number
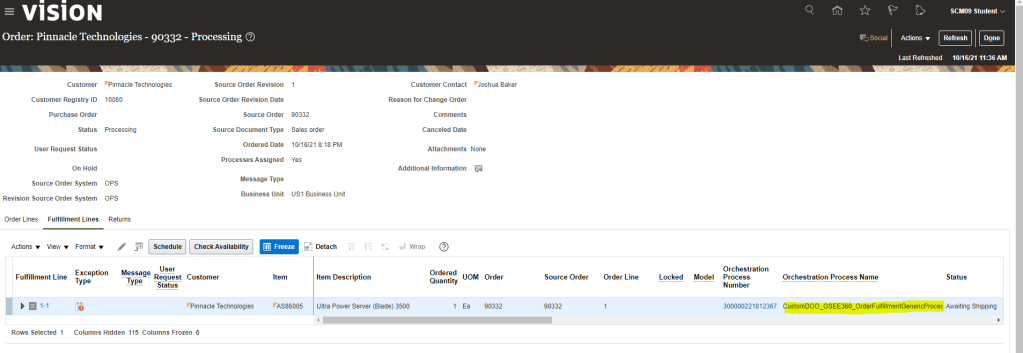
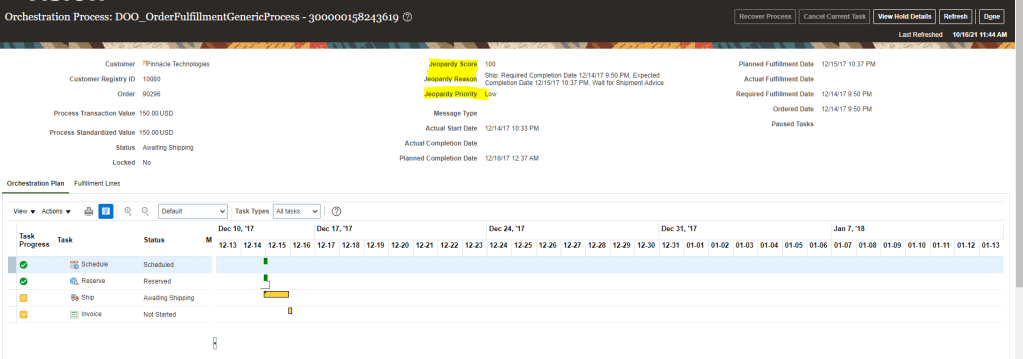
- Click on Orchestration Process to See Jeopardy Details
Please Note: Since my order will take some time to move, Below screenshot is of different orders.
Currently Jeopardy Score of this order is Low as it is in manageable range,